Thursday, December 31, 2015

2015 Brew Year in Review

Another year come has come and gone as 2015 marked my sixth year in this wonderful hobby. The first half of the year I ended up producing zero, I repeat zero, gallons of beer. I held up my vow to not brew until I could do so inside. It took a while, but I finally finished!

Brewery Build

Look back at the progress posts here:

  1. Indoor Brewery Plans
  2. Workbench
  3. Brew Stand
  4. Utility Sink
  5. Ventilation


After setting up the brewery I then decided to shift all my free time into raising a puppy.

Beer Making

I did end up making a few batches of beer - the inTROduction session ale, and the dumper brown.  The Simple Blonde Ale, which had me worried but ended up fine.  And the last brew of the year was the big Russian Imperial Stout for National Homebrew Day.

Beer Blogging/Writing

Though my posts were somewhat numbered here on the personal blog I was able to contribute to other online sites like Homebrewtalk.com and Homebrewacademy.com

Commercial Beers

We also can't forget that this summer I was able to vacation in Vermont and get Heady Topper!

Resources Created

Created the sortable and searchable Yeast Strain Table to help identify and compare homebrew yeast strains.


Thats the quick of it!  Hope your 2015 was a great one and that 2016 is even better.

Hoppy Brew Year!

Monday, December 21, 2015

Simple Blonde Ale

Blonde ales can be a tricky beer as they are really all about balance.  I tried another quick brew with a 30 minute boil for this one.  Efficiency was significantly lower so I will have to investigate why for the future.

I apologize for the lack of tasting notes and pictures as I wanted to get the recipe up before I forget about it.

Simple Blonde Ale
Brewed On: 9-19-2015
Kegged On: 
Style: 18A American Blonde Ale
Batch Size: 5 gal 30 min boil
Efficiency: 65%
OG: 1.043
FG: 1.011
IBU: 24
ABV: 4.2%
Yeast: WLP090 Fermented 63 raised to 67 and held

Grist Mashed at 148 for an hour
100% - Pale Ale Malt (Rahr) -9.5 lbs

Hop Additions 
1 oz - Cascade 7.3% AA - FWH in a 30 minutes boil- 21 IBU
.5 oz - Cascade 7.3% AA - 5 min - 3 IBU

Water Adjustments
Montgomery County, MD Water - 1/2 Campden Tablet for all brewing water
5 grams CaCl to mash water
3 oz of acid malt used
Estimated pH of 5.52 (EZWaterCalc)

Tasting Notes: Will update once my cold is gone, but as I recall there is low citrus hop aroma that comes through slightly more in the flavor.  The bitterness is moderate and the beer was not as smooth as I was hoping.  In the future I will try to hit a higher gravity or decrease the bittering hops. Additionally, I may try to use all RO or dilute my tap water to minimize any sulfate from my tap water.

Monday, November 16, 2015

National Learn How to Homebrew Day - 55 Gallons of RIS

November 7th was National Learn How To Homebrew Day and the GOBS (Goshen Oak Brewing Society) decided to plan a Big Brew Day.  There were 11 brewers who combined their systems to make 55 gallons of beer!  Five 10-gallon batches of Russian Imperial Stout were brewed, and split into individual 5-gallon vessels to be fermented separately.  There was one individual marching to the tune of their own drum making their own 5 gallon batch.


The group organized the event through a lengthy back-and-forth email chain.  After a little deliberation a version of the winning RIS from NHC 2012 (Chernaya Polnoch) was chosen.  Everyone was left to their own devises for yeast. I believe there will be versions fermented with American Ale yeast, Nottingham, London ale (Wyeast 1968*), Ringwood (Wyeast 1187*), Irish Ale (Wyeast 1084*).

Despite having the ability to brew 10-gallon batches since the inception of my all grain brewing equipment (circa 2010), this was actually the first time I have ever done so!  An RIS was definitely pushing the capacity limit on my mash tun - a 52 qt coleman xtreme was filled with 32 lbs of grain and 9 gallons of water.  We could barely close the top on the mash tun and had to top off the boil with 3lbs of DME.  The batch using my equipment finished at 1.088 FG which should result in an 8.5%-9% ABV Russian Imperial Stout after fermentation is all said and done.

The brew day went-off with only one real hitch - we all finished roughly around the same time and only had one water source to chill our batches.  This left many of us impatiently waiting.  During the day we were able to utilize a newly motorized grain mill.  A Brutus system was used to perform two separate mashes.  10 gallons was transferred to another boil pot and burner, and 10 gallons remained on the brutus system to boil as normal.

A few of the attendees were extract brewers who were able to fulfill the "Learn" portion of the event.  I think we may have a few converts now that they have seen how easy it is to make an all grain wort.

Compliments to our host Vitol for providing his home and smoking some delicious pork. Also praise to the resident GOBS chef, Gene, who provide some amazing ribs!  Lastly, thanks to all who brought samples of homebrew (and commercial) beer to keep us (de)hydrated throughout the day

Setting up - my system is on the far left

Milling Grains

Doughing In

camaraderie while mashing

keeping the kegs cold

The Brutus System
Boil!


* - Does your local homebrew store not stock Wyeast?  Check my yeast strain chart for comparable alternatives!

Monday, October 19, 2015

Don't get too Lax - First true infection

I have a confession, I have gotten too lax with my brewing.  I have caught an infection in my brown ale, and I possible have another off flavor in my most recent brew, a blonde ale.  Which is currently carbonating and I will reevaluate shortly.

I have been a big fan of all the exBEERiments taking place over on brulosophy.com but I my be letting all their statistically insignificant data carry over into some actually significant brewing processes - I have neglected some cleaning/sanitizing and have been using unhealthy yeast.

Brown Ale Infection

For the brown ale, I have narrowed down the cause of the infection to three potential areas
  1. Unboiled DME
  2. Ball valve
  3. Contaminated yeast
I think my infection came from 1 or 3, while its possible number 2 was the cause, I think its slim. 

1) A little back story - when I kegged my brown ale I cleaned and sanitized my quick disconnect and silicone tubing and I sprayed starsan in and around the quick disconnect on the pot's ball valve. I then attached the hose and gravity drained right from the kettle into a cleaned and sanitized keg.  I grabbed a plastic cup in the brew area and weighed out the DME to use in the keg for carbonation.  I dumped it right in the keg (didn't boil it) and let it sit for a little over 3 weeks to naturally carbonate.

When I hooked up the keg and pull some off, it was all foam and had a very sour note.  I did my research and new I was overcarbonated and it was most likely caused from an infection.  I off-gassed the keg twice a day for over a week until it finally was not pouring foam.  The samples were getting less sour, but they were taking on new off flavors - phenolic, clove, spicey, and a slight "meaty" note all accompanied with an astringent bitterness.  The sourness had faded but this beer was not getting better.

Just like a baseball skipper, I made the call to pull my pitcher and dump the brown ale...

[moment of silence for dumping 5 gallons of alcohol]

Life is too short to drink bad beer!

2) Anyways, I did save a bit of the sample to test and the gravity had dropped 2 points from 1.011 to 1.009 so something unintended definitely got to work in that beer. As you can see from the pictures below, even though I clean out my ball valve and boil kettle after each brew, some stuff gets in those threads.  I have since disassembled and cleaned all of those parts.  I also don't think I am going to be fermenting in the kettle anymore - probably not the cause of the potential grime, but I prefer to see what is going on in the clear better bottles anyways.

You can see the dirt in the 7 to 8 oclock quadrant of the valve

Same picture with slightly different lighting

Flecks of crud on a napkin after brush out the inside of the ball valve


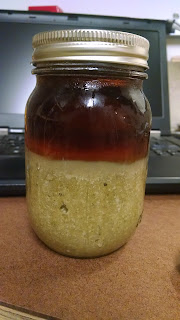
3) The last possible cause for my infection could have been the yeast.  I harvested the WLP002 from inTROduction ale by just pouring the yeast slurry from the better bottle into a mason jar which had been boiled.  It should have been fine, but who knows what was kicking around in the air from the time I finished racking to the keg, until dumping the yeast slurry.  It also took a good 2 days for that yeast to show signs of fermentation.  Definitely plan on making a vitality starter next time.

Off Flavor in Blonde Ale?

So I just kegged my blonde ale on Saturday and taking a swig from my final gravity sample I found myself shaking my head in shame again.  I tasted a little bit of a vegetal character, much like V8 tomato juice.  This is where I am really interested to see how this beer turns out after carbonation - did I get DMS from the 30 min boil?  Or was it the slow start to my fermentation?  A statistically insignificant exBEERiment would state it wasn't the boil time, but instaed was caused by the slow fermentation.

Yeah, you caught that did you?  I had an even slower start to my fermentation in the blonde ale than I did with the brown!  I used WLP090 San Diego super yeast which was a few weeks past its best by date.  I was TOO LAZY to make a starter, so I just took 2 L of my blonde ale wort and added the yeast to the stir plate.  About 8 hours later I pitched the yeast and wort into the rest of the wort to ferment.  It took right under 72 hours for it to start to fermenting - not optimal

Recap

I have been to lazy to make sure my yeast is at optimum health and pitch rate to ferment my beer to its best potential.  I need refocus my efforts toward better brewday preparation.  I will update when i have a better idea about how the blonde turns out.  If it is DMS I am going to have a constant inner battle with whether it was the 30 minute boil, or the slow fermentation start.

I can control both of those variable in my next brew.

Until then...everyone hug your uncontaminated and off-flavor-free beers for me.  You don't know how much you should appreciate them :)


Wednesday, October 7, 2015

Bad Bear 2 - British Brown Ale

As you may recall about two years ago I made my first attempt at an English Brown Ale.  It had a nice malt profile, but there was this tangy sour character I didn't find appealing.  I went ahead and blamed it on the S-04 yeast I used.  But after further research I may have placed the blame on the wrong ingredient, or maybe not.

I looked back at the old recipe and noticed I had Victory, Biscuit and Special Roast.  I have come to learn that Victory is Briess' brand of biscuit malt.  I decided to swap out the Biscuit (think the maltser I use is Dingmanns) for all Victory in this recipe.  I then did some research on Special Roast.  Lo and behold it can produce that tangy sour character!  See description from Briess below.

"Special Roast is not only more deeply roasted than Victory® Malt, it is also produced from a proprietary malting/roasting process that kicks up the intensity of the toasty and biscuity flavors, develops noticeable bran flake notes and creates its distinguishing bold sourdough/tangy flavor" - Briess Malting

Harvest WLP002 English Ale Yeast
Harvested WLP002 from inTROduction
So I may have written of S-04 too soon, but I like WLP002 so much and I didn't want to take a chance on the sour/tart character coming from yeast either.  Plus I have been trying to harvest yeast using the simple method and had a couple mason jars left over from my inTROduction session ale ready to ferment away.

Anyways, now that I cut out the Special Roast and S-04, this beer is looking less and less like a slightly modified Bad Bear so I decided to go with pale chocolate, at twice the amount, instead of chocolate malt in the original.  I am a big fan of pale chocolate malt and hope this dosage works well for this beer.  I also am using Caramunich because its what I have on hand.

I made some modifications to my brewing procedures to speed things up on brewday and was able to make this All-Grain batch happen in 3 hours!  I did a 30 min mash and a 45 min boil.  I then fermented directly in the kettle - a practice I may need to implement more often in the future.  The only real issue with the speed brew was that I forgot to take an OG reading so I have no clue what this beers ABV is and am providing the numbers below as a rough guess.

Despite the numerous recipe changes, I am sticking with the name since I enjoy the label so much!

Bad Bear 2 - British Brown Ale

Brewed On: October 6, 2012
Kegged On: October 27, 2012
Style: 11C - Northern English Brown
Batch Size: 5 gallons
Efficiency: 75%
OG: 1.048?
FG: 1.012
IBU: 26 (Rager) 
ABV: 4?%
Yeast: Harvested WLP002 ~250 billion viable cells Fermented at 64°

Grist Mashed at 148 for an hour
80% - Pale Ale Malt (Rahr) -8 lb
10%  - Victory (Briess) - 1 lb
5%  - Caramunich - 8 oz
5%  - Pale Chocolate - 8 oz

Hop Additions 
.4 oz - Magnum 14.7% AAU - FWH in a 45 minutes boil- 26 IBUs


Water Adjustments
Montgomery County, MD Water - 1/2 Campden Tablet for all brewing water
2 grams gypsum to mash water
2 grams CaCl to mash water
2 oz of acid malt used

Tasting Notes: Batch Infected!  Maybe Bad Bear Brown Ale is destined to be bad...I plan on re-brewing this again in the future to try and conquer this style which continually seems to allude me!

See this post for further details

Monday, September 28, 2015

inTROduction - American Session Ale

Since it had been 6 months since brewing and I had drained my stash of Heady Topper, I needed to brew something hoppy.  I had a solid amount of Citra in the freezer just waiting to be used so I decided to make a hoppy american session ale for the first brew on the indoor induction brewery! 

The brew day was pretty solid for the first run on a new system and I tried to document some of it in this video below.  I don't know if my enthusiasm showed through enough, but let me just say it was AWESOME being able to brew a batch of beer inside as it absolutely down poured rain all day outside.


I made my first attempt at a hoppy session beer last year and then failed to document it on the blog - shame on me.  In that attempt I took the Scottish 70 /- recipe from Brewing Classic Styles and threw a bunch of hops in it.  I made it with maris otter LME for a quick extract batch during the mash of another beer for a two-brew, brew day.  It ended up tasting okay and was a light-brown hazy ale, but just wasn't what I was looking for.  Too much malt character and the hopping ended up being too Citra forward (had 3 oz in the dry hop) - if that is possible.

Taking the previous attempt into account I decided to lean more towards a grain bill I would use in a pale ale, but upped the crystal malt %.  I used Weyermann Caramunich I (~35 lovibond) because I purchased five pounds of it in a bulk buy, but I think using Crystal 40 could achieve very similar results in the future.  I like to have a little crystal malt as I think the sweetness it imparts pairs nicely with Citra hops.  Also having a less fermentable grain is pretty crucial in keeping these low gravity hop bombs in check.  I rounded out the recipe with some Munich malt for character and more equal parts of Simcoe and Cascade to prevent the Citra from being overpowering.

I present inTROduction - an American Session ale.  A play on words for my innagural brew on the induction system.

inTROduction - American Session Ale

Brewed On: June 27, 2015
Kegged On: July 16, 2015
Style: 10A - American Pale Ale
Batch Size: 5 gallons
Efficiency: 72%
OG: 1.043
FG: 1.011
IBU: 47 estimated (Rager) 
ABV: 4.2%
Yeast: 1L starter of WLP002.  Fermented at 64° for 3 days then rise and held at 68°

Grist Mashed at 152.5 for 40 minutes
74% - Pale Ale Malt (Rahr) - 6.5 lbs

14% - Munich (Briess) - 1.25 lbs
11% - Caramunich I (Weyermann) - 1 lb

Hop Additions
.44 oz - Magnum 14.7%AA - FWH - 35 IBUs
1 oz - Cascade 7.3% - 20 min - 12 IBUs

1 oz each of Simcoe, Citra, and Cascade at Flameout
Dry hopped with 1 oz Citra, 1/2 oz Simcoe and 1/4 oz Centennial

Water Adjustments
Montgomery County, MD Water - 1/2 Campden Tablet for all brewing water
8 grams gypsum to mash water, and 2oz acid malt for an estimated mash pH of 5.41 according to EZ Water Calculator


Tasting Notes

Appearance: This American session ale pours dark amber in color with good, but brilliant clarity.  It has a frothy just off-white head with great retention and good lacing.

Aroma: High tropical fruit notes dominate the pleasant hop aroma while moderate background notes of grapefruit citrus are present.  There is a low background note of sweet malt character that is most likely accentuated by the Citra hops (which can lend a perceived sweetness themselves)

Flavor: Moderately high hop flavor of tropical fruit with low citrus notes.  There is a herbal-spice character I often notice with centennial that I detect, but need to figure out a better way of describing.  Moderately low caramel malt sweetness.  Moderately-high hop bitterness.  Finishes slightly dry. Balance is moderately hop forward and bitter.

Mouthfeel: Moderately high carbonation, medium-light body, low creaminess, no astringency and no alcohol warming

Overall:  This was a refreshing hoppy session beer, however, at the time I finally got around to writing down my tasting notes it was a shell of what it was fresh.  Alas, that's what happens to all hoppy beers over time. Citra is still the dominant hop in this attempt, but the other hops add necessary complexity too keep this beer from being too one dimensional.  I liked the way this came out and I think in the future I may mash a little higher to increase the body a smidge.  additionally I may use a lower lovibond crystal malt which shouldn't impart as much caramel sweetness, but retain the body I am looking for.

Tuesday, September 15, 2015

Brew Thru #6 Updates

When you don't post often, there is always something to discuss!  In this Brew thru...


  • Sharing Homebrew
  • Why I am switching (back) to Five Gallon Batches
  • Alcoholic Root Beer
  • Shegogue Brew Around the Web


Sharing Homebrew

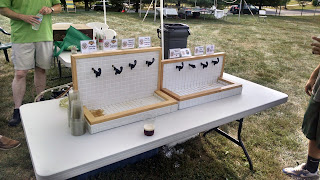
8 Taps
(Eight Taps for the picnic)

Last month I attended a community picnic featuring a homebrew tent.  Eight different home breweries (Shegogue Brew included) provided a variety of beer for all to enjoy.  I brought my session IPA (recipe and review to be posted soon) and it seemed to be well received.  Its always nice to see smiles on the faces of complete strangers enjoying your beer.

Tasting a new brewer's beer
(Sensory Analysis for new brewer's beer)

Five Gallon Batches

I have reverted back to five-gallon batches and I want to explain why...

In the beginning, 99% of homebrewers follow their extract recipe and kit to "a tee," and I was no exception. All of those extract recipes are designed for 5 gallons post-boil (with top off water). It's easy since all ale pales have a clear demarcation at the five gallon mark. So why does it seem that a lot of brewers move onto batch sizes which not divisible by five?

My guess is Brewing Classic Styles - To some this is their homebrew recipe bible.  All of the recipes in this book are formulated for 6 gallons post boil, leaving a half gallon of trub/hops etc in the kettle.  The remain five and a half gallons is fermented leaving at least five full gallons to go into the keg.

This may work for some, but looking back I can see all the headaches it caused me!

I ferment in six gallon better bottles.  You know what is a sure way to make a mess or require a blow off tube, which can still make a mess?  Fermenting five and half gallons of wort in a six gallon better bottle.  I did this for a while and just used a blow off tube, but it is a pain cleaning both airlocks and blow-off tubes all the time.  Not to mention liquid suck-back if I chilled the beer down quickly.

You know what doesn't make a mess or require a blowoff tube (in most cases)?  Filling that six gallon better bottle with five gallons or less of sweet wort.

Five gallon kegs hold five gallons, not five and half.  If you aren't paying attention you can fill the beer in the keg so high that it covers the CO2 dip tube.  This is a sure way to spray beer everywhere when you "burp" air out of a pin lock keg (ask me how I know).

So in an effort to make less of a mess while also saving money on ingredients, I am going back to 5 gallon batches.  If you are interested in any of my recipes, please take note of the batch size as the older recipes will still utilize a six gallon size.


Not Your Father's Root Beer

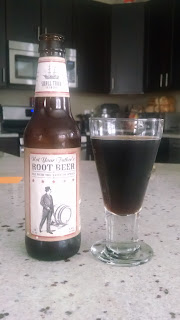
Not Your Father's Root Beer

A friend gave me a bottle of this on Labor day weekend.  If you have not had this one yet I will tell you it does taste exactly like root beer.  Only difference is it hash a slight boozey note in the finish.  My reaction was much like my friends - you start out amazed at the sorcery that is conjured to create an alcoholic root beer and think "Man, I could drink a whole six pack of this!"  By the end of the glass, however, you are changing your tune.  I was on a rather empty stomach, but even so it was just too sweet.  I have mixed beer and sweets in the past and never makes my stomach feel good.  This beverage just expedites that feeling by putting the two together for me!  Would still recommend trying one if you haven't.  I may have to look into creating something similar in flavor but decreased sweetness.

Shegogue Brew Around the Web

Only one article to note since the last brew thru - Organizing Tips for Homebrewers.


Well, that is it for now!  I am about to put my brown ale on tap and when I get a chance I will be posting that recipe as well as the session IPA.  Looking to try and brew this weekend, but having trouble deciding what to make... suggestions welcome.

Cheers!

Tuesday, August 11, 2015

New Brew Assistant in the Making!

I have been rather MIA from my brew hobby due to a new member of the family - Our golden retriever puppy, Avery!

Avery the golden retriever

My wife grew up with many dogs, but her (still lived with her parents) golden retriever passed away last year.  After a grieving period we decided we wanted a new dog of our own.  We went back to the breeder my wife's family had gotten all their golden's from and had to wait almost a year for a pup.

Avery is 11 weeks old tomorrow and is adjusting very well to his new home.  I haven't introduced him to the brewery yet, but once he shows a little more restraint in other areas of the house he will become my brewing assistant!

Brew News:

Prior to getting Avery I was able to make my first, and sad to say only, batch on the new system.  It was a session IPA using Cascade, Simcoe, Centennial and Citra hops - so you know its delicious.  I hope to provide a recipe update post with tasting notes and obligatory pictures soon.  Stay tuned!

Until then, Avery says "Relax, don't worry, and have a homebrew!"

Avery in car

Thursday, June 25, 2015

The Search for Heady Topper

The Alchemist's Heady Topper was just recently listed as the 6th best craft beer by Zymurgy and at the time of writing, this still holds the number one spot on Beer Advocates top 250 beer list.  There is a lot of hype surrounding this coveted beer which is always in short supply and high demand.  The tale below is my journey on obtaining some of this rarity.

Does it live up to the high expectations?  

Read on to find out...

____________________________________

The Search for Heady Topper

I woke up at 7:28am, just a mere two minutes prior to my phones planned alarm.  Even though I am on vacation I don't feel the need to sleep in anymore.  My mind quickly reminds me that today's vacation itinerary has only one item listed:
  • Obtain Heady Topper
As I roll out of bed the slight ache in my hamstrings reminds me of how out of shape I am.  The pain was caused by the beautiful, yet strenuous, hike up Mt. Mansfield via the Hazelton trail we had made just two days earlier.  I stretch out and decidedly make my way down the hallway and straight into the kitchen.  I methodically open up the coffee pot, place in a new filter and proceed to fill the basket with some wonderfully aromatic dark roast from the Vermont Coffee Company.  I know today is going to be a good day as no coffee grounds fall onto the counter top.  I set the machine to brew and head back to my room to get dressed. 

I quickly throw on my jeans and a shirt and check the weather on my phone.  Just as yesterday predicted, today will be cool and cloudy with intermittent rain showers.  I grab my raincoat and put it on inside since I am already a little cold - the low 60s in Vermont is quite a bit different then the mid 80s I just came from back home - and walk back into the kitchen to grab my freshly brewed cup of coffee.  I slowly take my first sip of coffee and look out at the cloud-covered mountains and smile. Even a gross day up here is better than a pretty one at home.  But then again, everything is better on vacation.  As I am halfway through today's morning joe the other members of my squad groggily stumble out of their rooms and utter "Ooo coffee!" as I think to myself "You're welcome!  It doesn't brew itself ya know?"

After everyone has poured their coffee I go back to the pot to top mine up.  I finish it and quickly brush my teeth, its a little after 8:30 and I am ready to go.  We pile into the car and plug the address for the Beverage Warehouse in Winooski into the GPS.  We are off on our way.

About a forty-five minutes after leaving the lodge in Stowe we roll up to the store where my family voices their surprise to see a line which is already about fifteen people deep.  I on the contrary am not surprised.  It is 9:32am and Heady Topper is distributed in just a mere twenty-eight minutes.  I am hoping we have arrived early enough!  We jump out of the car and secure our spots in the back of the line.  
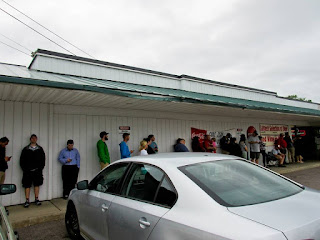
waiting in line
(Me on the left waiting in line)


I spend my time eyeing up my fellow beer nerds and talking with my wife.  She poses me for a picture reminding me I will want it for my blog - I do.  My sister-in-law states "this better be worth it!" Her boyfriend, who only just recently found out about this beer and is already captivated by the exclusivity (we will forgive him for not knowing about it sooner), assures her it will be.  I smile and nod in agreement.

Waiting in line 2
(Waiting in line)


As we kill time, which goes by very fast, I had to explain to everyone the reason for the line is because this is the only location which tells customers what time and day the beer will be available.  10am and 6pm on Tuesdays and Thursdays.

At 10 am the line starts moving.  I follow in suit like herded cattle, everyone is suspiciously quiet and moves with certainty blindly trusting the first person in line.  I send my wife off on her own side mission - to see if any of their Sip of Sunshine shipment from Friday is still available.  As I am serpentining through the well-stocked liquor store, admiring their vast selection, an employee quickly moves by while quietly counting.  I am number 17 while my sister-in-law's boyfriend is 18.  The guy in front of me, who hadn't spoken to anyone for the past half hour, turns around and asks "What number did he say I was?"

I tell him "16. Do you know what that means?"

He is in a world of his own and answers with "We should be okay" as he turns back around - eyes on the prize.

As we get to the walk-in cooler I watch line numbers 14 and 15, a twenty-something couple who appear to be doing the exact same thing we are, grab a case and debate getting another.  They ask how much it is per a case and move on, content with one.  I reach the attendant and and he states "A Case?"

receiving heady topper
(Receiving my case)


I reply "Yes, please!" and and move towards the cashier with case in hand.  My sister-in-law's boyfriend gets a case as well and as he joins me in line. We then hear the employee state that no more cases are being handed out and that he got the last full case.  The remaining line members receive three 4-packs of beer.  As I am waiting to pay I see a lady walk in and ask the gentleman at the cash registers "Where is it?"  

They point to the walk-in, but she is too late.  

10:05am and they are sold out.

I pay for the beer at the tune of $80 a case, and tack on two bags of ice.  I then make my way back to the car.  I have an internal struggle on cracking one open right there, but I hold firm and decide wait. The hard part is over, I can enjoy the liquid at the comfort of the lodge later.  

Today's mission has been accomplished!

Happy Heady Hunters
(Happy Heady Hunters)

____________________________________


I hope that little story was an enjoyable change of pace from my usual muttering.  I am not much of a writer, so hopefully it wasn't unbearable from a grammatical standpoint.  It was an exciting leg of my trip to say the least.

It ended up being rainy so later that afternoon I found out that the Craft Beer Cellar in Waterburry had that Sip of Sunshine so the wife and  I headed down there to grab some.  This store had a one person, one 4-pack, rule.  So the wife and I each bought a 4-pack.  They also had Lost Nations Gose which I had heard good things of and purchased that too.  After locking these precious items in the car we walked across the street to Prohibition Pig for a few samples.

My Thoughts (Finally) on Heady Topper

But enough is enough.  I have to tell you my thoughts on Heady Topper...

I had the Sip of Sunshine first before actually drinking a Heady Topper later that night and the Sip of Sunshine wasn't as good as I was expecting.  This is because I tend to dislike the oniony/dank note that some hops can put off and the Sip of Sunshine had that character.  [Reminded me a bit of Ballast Point's Sculpin.  So if that your jam then Sip of Sunshine won't disappoint you.]  I also had very high hopes since another friend had told me he thought Sip of Sunshine was better than Heady Topper. 

This made me worried for my first sip of Heady Topper as maybe I was putting these beers too much on a pedestal...so I cracked the The Alchemist's beer with a little bit of trepidation...

Rest assured as I tell you that it DID live up to the HYPE!  The beer is just amazingly balanced.  The hop flavor and aroma is up there with all of the best IPAs out there, but the drink-ability is what takes it to the top of the list. 

I have been trying to disseminate my stash to fellow beer connoisseurs.  One of them, who is a BJCP judge, told me after having Heady topper for the first time that he has had fresh Pliny the Elder and he thought Heady Topper was better!

Total Vermont Beer Haul and/or Samplings

I probably wont give any full beer reviews cause commercial beer reviews really aren't my thing, but be on the lookout for some tasting notes via my Homebrew Wednesday videos.

(Vermont Beer Haul)


Oh you aren't subscribed to the youtube channel?  HERE go fix that :)

One last thing...

I knew Heady Topper was hard to get, but I was a little shocked when I kindly asked employees at various stores if they had any left (day after delivery) and they looked at me as if I was an alien.  Its not as if I was expecting them to have it, but they could have been nicer in their response.  The same went for when my wife she asked about Sip of Sunshine.  So if you have to ask, then they don't have it.

I wonder if these beers would/will have as much hype when they increase their production capabilities to meet or exceed the demand.

Cheers!

Tuesday, June 9, 2015

Brew Thru #5 - Ventilation progress, BJCP Written Exam

Slowly but surely I am working on finishing the basement brewery. I can't believe it has almost been a full six months since I last brewed up a batch of beer...unacceptable, right? Well that's what happens when you tell yourself you won't brew again until the new setup is finished. But I have good news since I am almost finished! Check out the video below for my updates on the build.

I just need to wire up my variable speed control and clean up the basement.  Then I will be good to brew!  Looking to make something hoppy the weekend of the 20th.


BJCP Written Test

Well, I took the test a few weeks ago and I don't expect to receive a good score once I get the grades back.  We all know that feeling from our days back in school when we were ill-prepared for a test. I knew my preparation for the exam was nowhere near where it needed to be - and the test confirmed that. It is unfortunate because the test itself really wasn't difficult.  [If you weren't aware the full list of potential questions is available over at bjcp.org]  Some would say the questions were the easier ones from the pool of questions which could be asked on the exam. I just didn't have styles memorized and that is always a big part of the exam because you have to compare and contrast two sets of three different styles.


I am still waiting on the results, but if I get anything above a 70 I will be surprised. I need a 75 to get the necessary score to move up to "National" - I also need 9 more experience points so regardless it will definitely be a little while until I achieve a higher rank.


Shegogue Brew around the Web

I was featured in another article over on HomeBrewTalk where I give some suggestions on how you can Speed Up your Brew Day.  Additionally, the folks that run HBT have entered into the homebrew business and I have penned some tutorials over on their new website: http://www.homebrewsupply.com/learn be sure to check them out, especially if live around San Marcos, TX.


I also have been trying to post up more Homebrew Wednesday videos.  If you enjoy watching me talk to the camera, sample beers, and make a general fool of myself then you NEED to subscribe to the YouTube channel - you won't be disappointed.


On Deck...

Heading to Vermont next week for a little vacation. I will try and grab and document some of the wonderful beer the state is known for so I can share on this blog. Stay tuned, cheers!

Wednesday, April 29, 2015

Brew Thru #4 - Sink Video, BJCP Comp, Articles on Other Sites

Well, I haven't been doing too well in the blog frequency department have I? But quality over quantity right?


Brewery Updates

I installed the sink and ordered some of the parts for the ventilation.  I went with the Tjernlund M-6 6" fan which can pull a whopping 530 CFM of air and a variable speed control to go with it.  Hoping to get to installing this in the next couple of weeks and ideally brew my first batch on the new system by Memorial day at the latest. 


Video of the sink:


BJCP Judging and Test

I judged at the Spirit of Free Beer competition on April 17, and April 18, 2015.  I participated in both the Friday and Saturday judging sessions and there were some really great beers!  I got to judge Belgian Specialty, and American Ale (all American browns) categories on Friday night and the Specialty, and Pilsner categories on Saturday. 


I have said it before, but it needs to be repeated: When entering the specialty category only state "special" ingredients that are noticeable.  Often times I will get a beer in the specialty category that has the "kitchen sink" added to it and only one of those ingredients was noticeable compared to the base style.


Judging 40+ beers in two days is a lot of writing, but it is good preparation for the written BJCP Exam I am taking next month!  I am trying to study my butt off to and from work on the commuter train so I can hopefully get a high enough score to become a National judge.


Shegogue Brew Around the Web

I recently had a new article posted over at Homebrewtalk in regards to Recipe Development.  Be sure to let me know if  you develop and brew any "3-2-1" recipes.  Additionally, I wrote a textbook article on beer math which is good for beginning brewers looking to understand how to derive ABV, attenuation and gravities. 


Lastly, I had an article about dialing in your system posted over on Homebrew Academy


Monday, April 13, 2015

Basement Induction Brewery Build - Utility Sink

Yesterday I FINALLY got time to tackle installing the utility sink in my basement. I had multiple hours here and there, but yesterday was the first full day I could allocate to this project.  It was a good thing because I needed the whole day!

As part of the brewery build you can check out the other projects:


Utility Sink and Plumbing

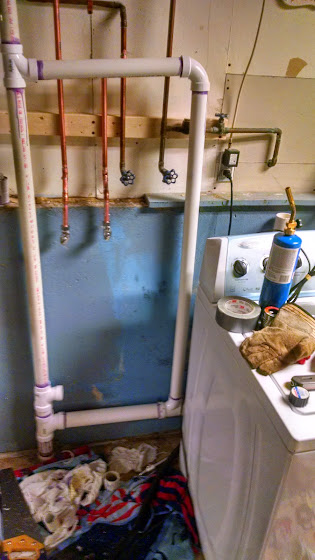
My existing plumbing in my basement only had a laundry standpipe and hot/cold water feeds. The laundry standpipe also wasn't up to code as the standpipe was 2" but the p-trap and other piping was 1 1/2". I redid the standpipe and added a new vent connection to meet code - and more importantly not have the laundry siphon out of my the p-trap on the sink

First, I turned off the water. Public Service Announcement - make sure to exercise (turn off and on) your gate stop valves on your water lines a few times a year. A few were REALLY hard to loosen. I then started to cut into the top pipe and my pipe cutter was walking all around on me and almost "threading" the pipe. Not sure if it was just a dull cutting blade or if its done. Regardless, trip 1 to the hardware store was made to get a new pipe cutter. I then got back and cut the pipe, cleaned and soldered in my fittings. I used tin foil held up by a metal thumb tack to prevent from burning my walls and/or house down - worked really well. I could have had some really nice solder joints, but I was scared the little bit of solder didn't make a good seal so I melted on more than I should have (probably totally unnecessary).


new pipe soldered
(Soldered a "T" in the cold and a "T" and 90 in the hot water line)
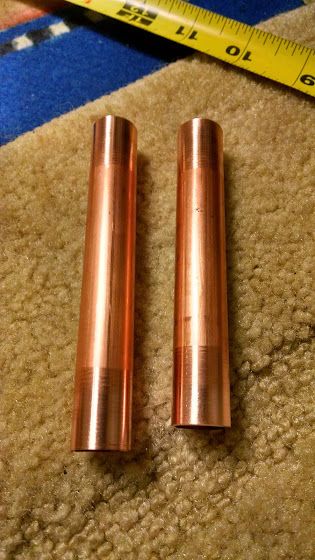
It is important to have clean pipe when soldering to ensure everything goes smoothly.  Here is a picture of some of my cleaned pipe sections.

cleaned copper pipe
(Cleaned Copper Pipe - Shiny)

Then I added two 45 degree fittings in alternating directions to extend me away from the wall and over the basements cement foundation. 

At this point I added on the compression shutoff fittings.

I then began the vent and drain/waste piping. I started with a normal hand saw, moved to a hack saw and then remembered I had a little multi-tool. That thing is a life saver! Towards the end I was getting pretty good at making even cuts. You can barely see the laundry standpipe behind the laundry machine, but its there. I actually had to make trip number 2 to the hardware store (right before Home Depot closed on a Sunday night) to get a slip joint and more 2" pipe for an extender for the standpipe since I had only purchased 2' sections #smallCarProblems.

laundry standpipe venting
(2" Laundry standpipe and 1 1/2" venting installed)
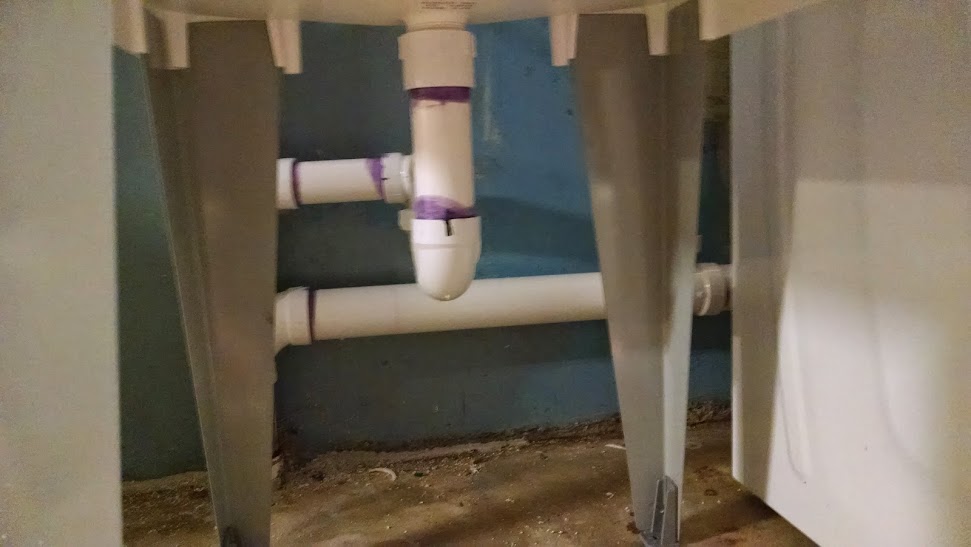
I then measured everything for the sink and glued it up. I had to be more precise here to make sure everything fit.  No pressure right?  It is only 9pm and the hardware store is closed, failure is not an option.

I ended up gluing the stub out and one part of the p-trap, then the sink tub and the other part of the p-trap. Everything fit perfect so I was able to slip the sink and p trap underneath and tighten it down. Phew...did something right.

Laundry sink drain
(Front View of the laundry sink drain piping)
side view laundry sink drain pipe
(Side view of the laundry sink drain piping)
Its like 9:30pm on a Sunday night and I'm thinking to myself, "Awesome I'm done.  Jjust need to connect the supply hoses to the shut-off valves...Oh crap! I didn't buy 2 of the same faucet supply hoses like I thought I did. Hardware store is closed, oh well." 

wrong supply hose
(wrong faucet supply hose)


I plan on going to get the correct hose tonight*. I did check it with the one hose and worked and no leaks and the tub drains quickly! Mrs. Shegogue Brew also did some laundry this morning and reported back with no issues. I call this a success!
full view of sink and drain
(full view)


Now I just need to install my venting solution for the boil and I can make some beer!

* Update - Went back to Home Depot on 4/13 and got the correct hose.  No wonder I picked up the wrong one!  These hoses were a mess and they only had 1 left and it was interspersed with the wrong one that I returned.

finished utility sink
(Done! Action Shot)


Thursday, March 5, 2015

Brew Thru #3 - Beer Style Finder and Guest Post Link

Wow, we are in March already!  We just got hit with hopefully our LAST Snow of the winter...

In this Brew Thru I will discuss:

  • Basement induction brewery updates 
  • A cool new beer style finder tool
  • Posts made on other sites and YouTube


Brewery Updates 

Currently over-analyzing what type of faucet for my utility sink will be the best "bang for my buck."  Also need to decide on what type of fan I want for venting the steam.  I really need to get moving on this though so I can start make some beer.  This winter has seemed like forever, and not having the indoor brewery setup is a constant slap in my face


Beer Styles Finder

Most of the homebrewing community is already aware of the imminent style updates coming to the BCJP Style Guidelines.  But what about just the beer lovers?  With the craft brew expanding to the masses the Craft Brewers Association as come up with a cool new tool on their web site to discuss beer styles!

(Beer Styles)


It is pretty nice tool which will help potential beer lovers find a beer that meets their palate needs.  In the picture below I selected 'Malty' and 'Hoppy' and was present with the following applicable styles: American Brown, American Imperial Red, American Stout, and Specialty.

Give it a try and see what you think!


Shegogue Brew around the Web

If you didn't see I had a guest post over on The Homebrew Academy where I talked about induction brewing.  I seem to mention it a lot here on my blog, but if you want to learn more about how it works I recommend check out the post.

I also just uploaded my second Homebrew Wednesday video where I give a visual walk-through of what I would do on a brew day and give an organization quick tip.


Other Thoughts

Really need to get back to updating/creating labels.  I am trying to do some GIMP tutorials to figure out how to make a new logo.  Any thoughts or tips in this area would be much appreciated!

Monday, February 23, 2015

Basement Induction Brewery Build - Brew Stand

As I mentioned at the beginning of 2015, I am finally putting the wheels into motion here with my indoor home brewery. To transform my basement into the induction run brewery I need to completely the following projects:


This past weekend, I tackled the brew stand.

Plans


Brew stand plans
(Brew stand plans)


Build

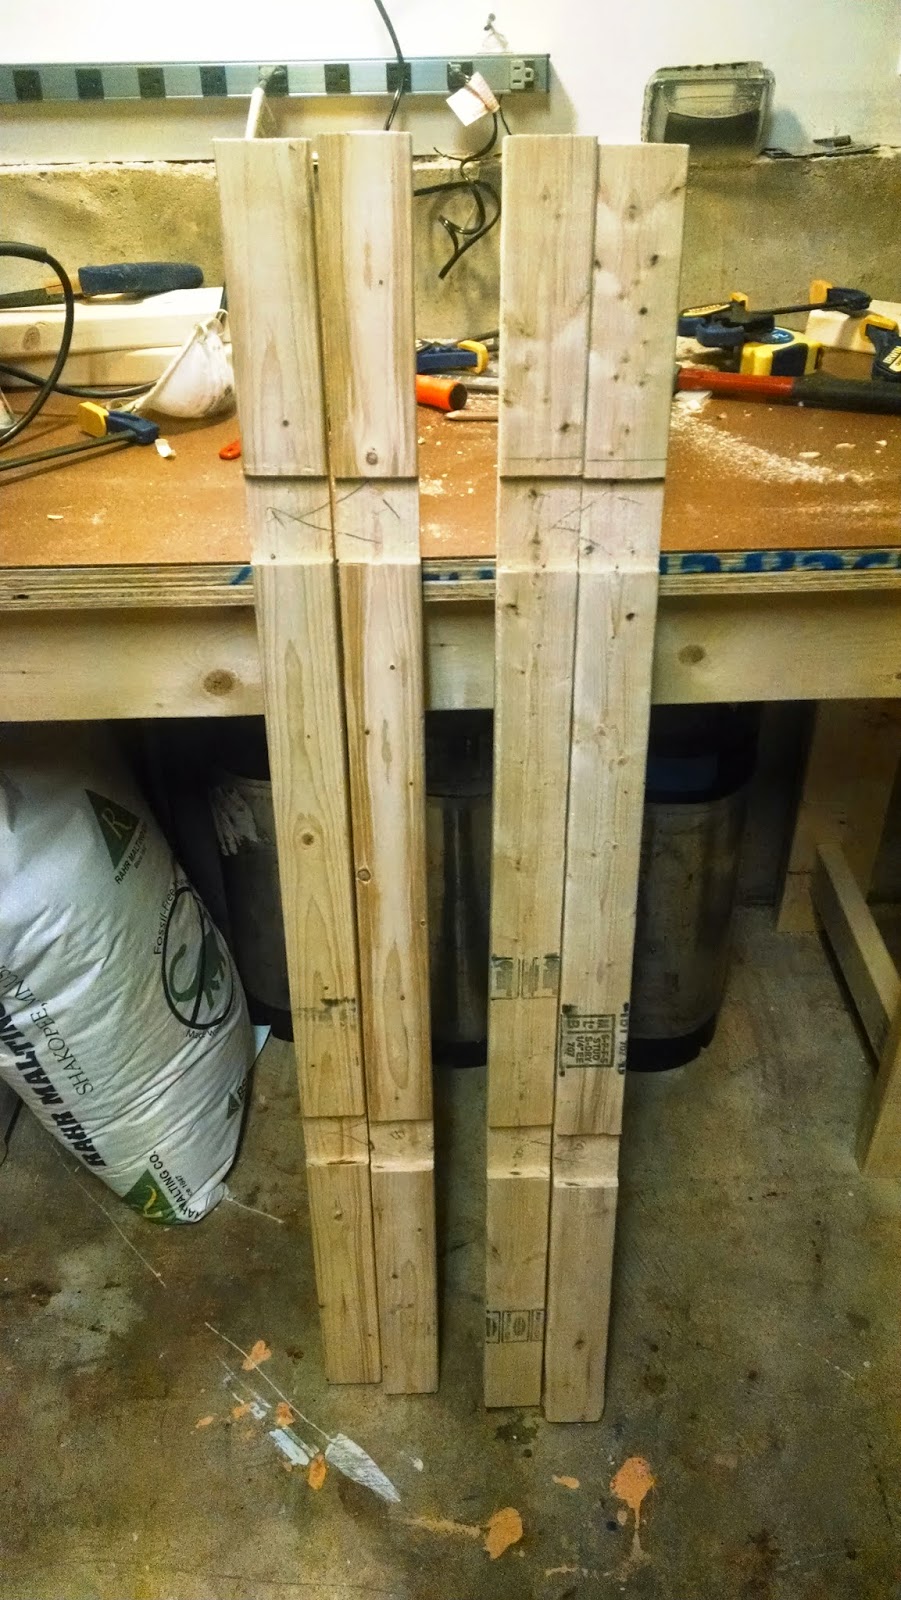
I don't seem to ever follow directions or plans 100%.  This project was no different.  I decided to dado out a 1/2" of the 2x3 dimensional lumber to hopefully increase the rigidity of the stand.  If I didn't do this the square frame, and later all my wort and mash weight, would be solely relying on #9 deck screws to hold everything up.  I, like most other homebrewers and DIY'ers, love to over build things so the screws alone may have been fine, but I felt comfort knowing some of the weight would be resting on the vertical 2x3.

2x3 verticals
(2x3 verticals with 1/2" dado)


I failed to account for the 1" decrease caused by my impromptu dadoes so the side-view of the plans above is actually 22" inches overall, and 19" between the verticals. RDWHAHB!  Everything fits in the end.

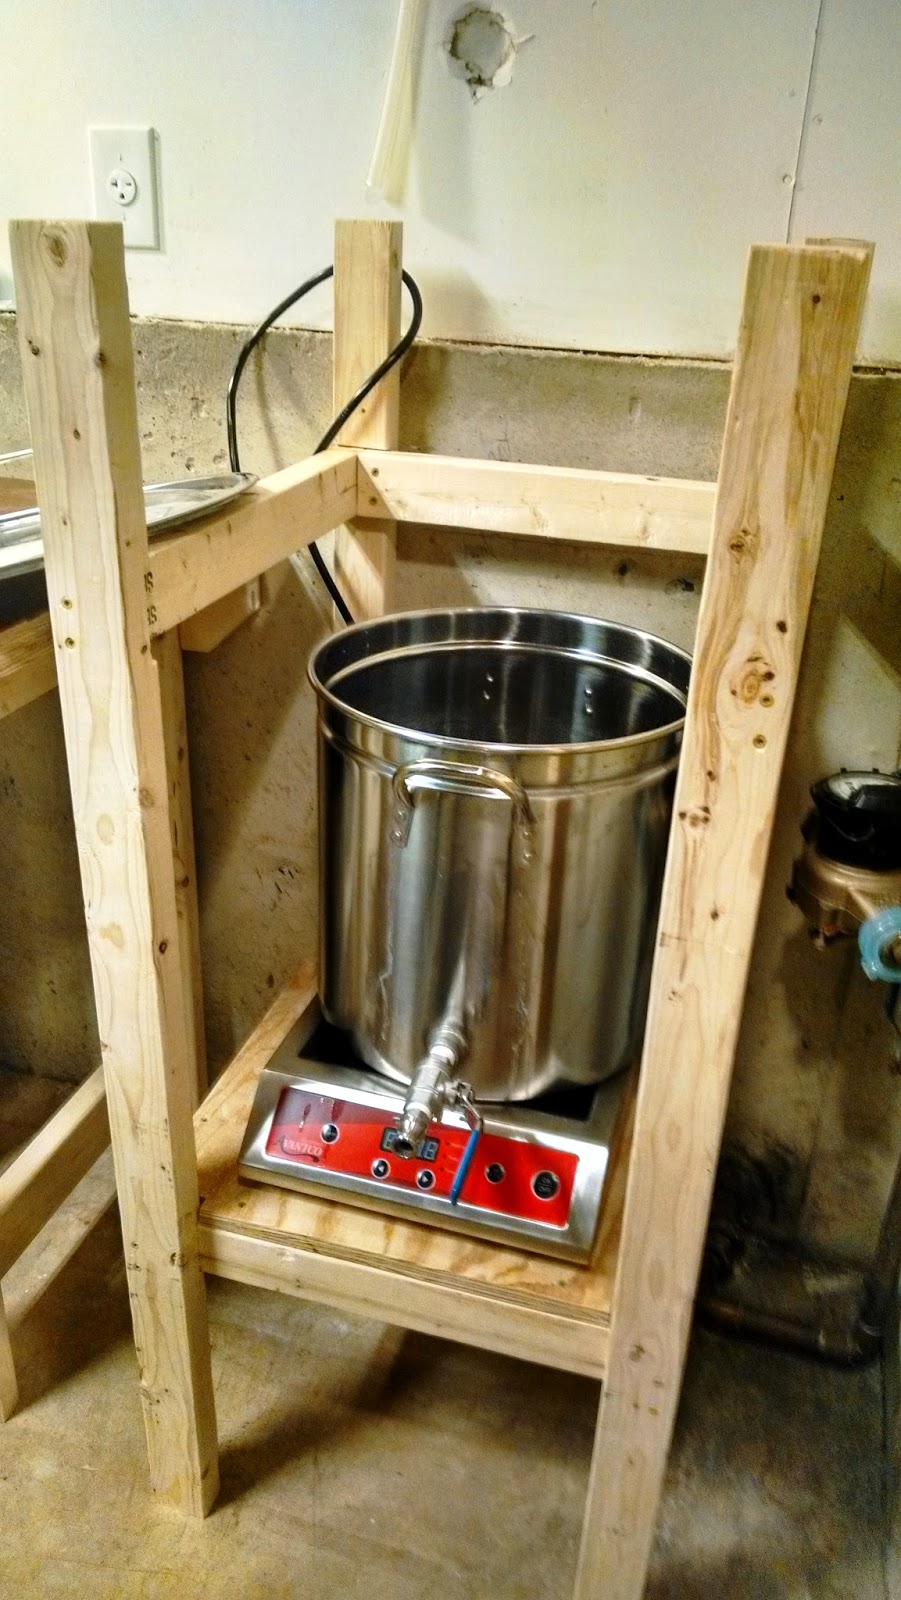
Brew stand frame
(Stand Frame)


After pre-drilling and screwing in the horizontal pieces for the burner-level of the stand.  I cut a plywood shelf, with notched corners, and fastened it down to the 2x3s with a few 1 5/8" drywall screws.

I then cut the 3 pieces for the open-ended top square and fastened them with the deck screws.  I did my best to try to keep everything in square, but the 2x3s had warped a bit since purchase.  This probably didnt' matter as I later found out the area of the basement I planned to put the brew stand is not even close to being level.  Oh well!  I placed a tiny shim under that front right leg and all is well.

Hypothetical Brew Day Pictures

Here are some pics with things in place and testing out different hypothetical brew day procedures.

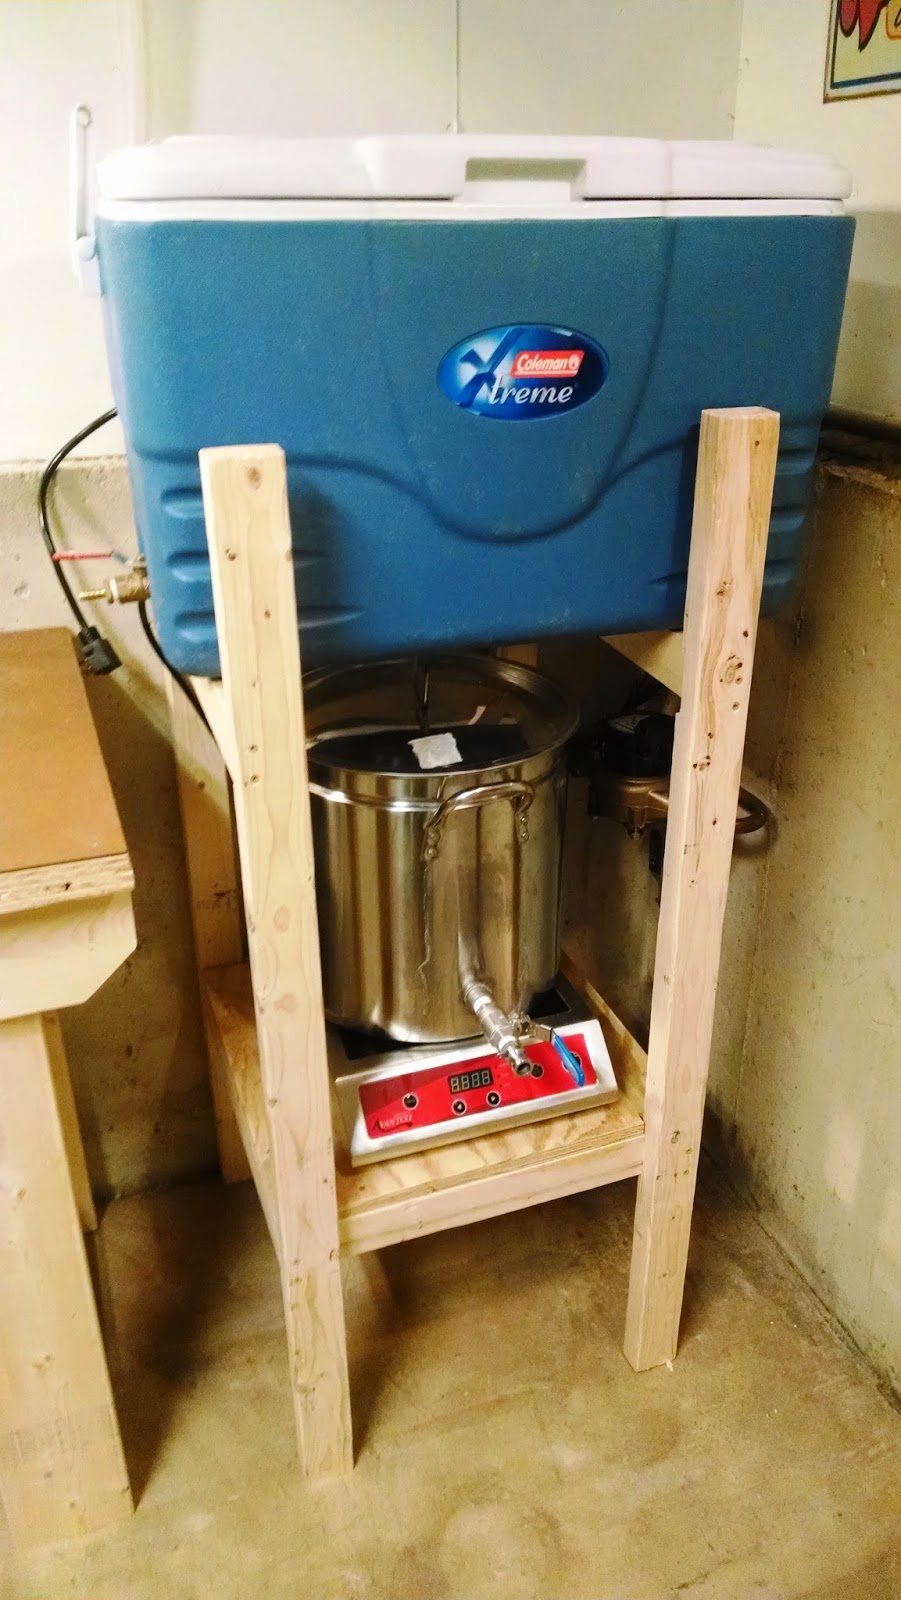
Hypothetical mash mode
(Brew stand - hypothetical mash mode)

Hypothetical sparge mode
(Brew stand - hypothetical sparge)
Hypothetical boil mode
(Hypothetical boil)
Kettler to fermenter
(Hypothetical draining wort to fermenter)

(Brew stand next to the bench - storage mode)

Future tweaks


I think I may cut the top of the front two vertical pieces shorter in the future.  I would have done it, but I had already swept up the basement of all the sawdust and didn't feel like repeating process.  They are at the height they currently are just cause I had had the guy at home depot cut them in half for transportation purposes.  I can image it will be easier to move the mash tun with grains for cleaning if I shorten those pieces.

I am probably going to stain or apply some sort of finish to the wood mainly to protect it from moisture and spills.  Being made out of wood, I will be able to easily adapt the stand in the future if I ever go with a pump or RIMS setup, but I think this will work fine for now.

Stay tuned as I hope to tackle plumbing a new utility sink and water lines next.