Showing posts with label Brew stand. Show all posts

Monday, February 23, 2015

Basement Induction Brewery Build - Brew Stand

As I mentioned at the beginning of 2015, I am finally putting the wheels into motion here with my indoor home brewery. To transform my basement into the induction run brewery I need to completely the following projects:


This past weekend, I tackled the brew stand.

Plans
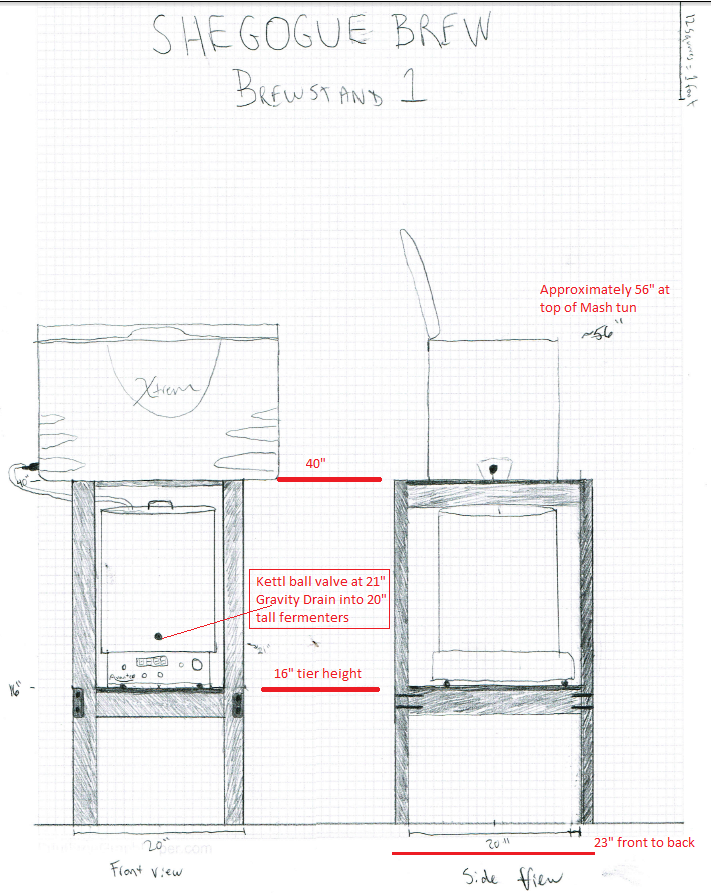

Brew stand plans
(Brew stand plans)


Build

I don't seem to ever follow directions or plans 100%.  This project was no different.  I decided to dado out a 1/2" of the 2x3 dimensional lumber to hopefully increase the rigidity of the stand.  If I didn't do this the square frame, and later all my wort and mash weight, would be solely relying on #9 deck screws to hold everything up.  I, like most other homebrewers and DIY'ers, love to over build things so the screws alone may have been fine, but I felt comfort knowing some of the weight would be resting on the vertical 2x3.
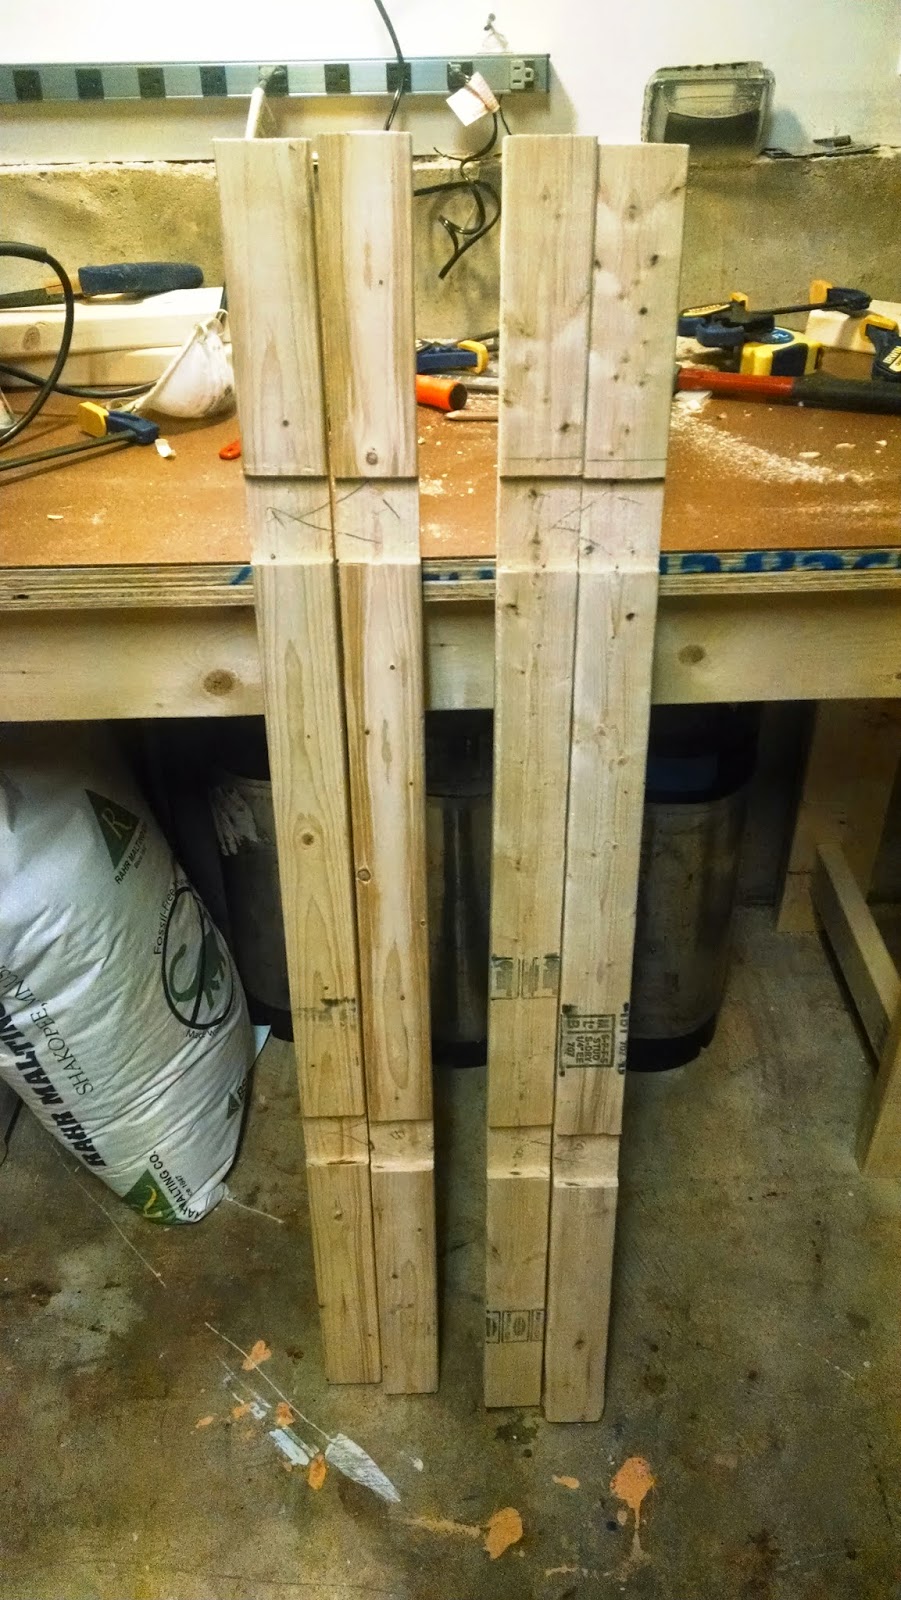
2x3 verticals
(2x3 verticals with 1/2" dado)


I failed to account for the 1" decrease caused by my impromptu dadoes so the side-view of the plans above is actually 22" inches overall, and 19" between the verticals. RDWHAHB!  Everything fits in the end.
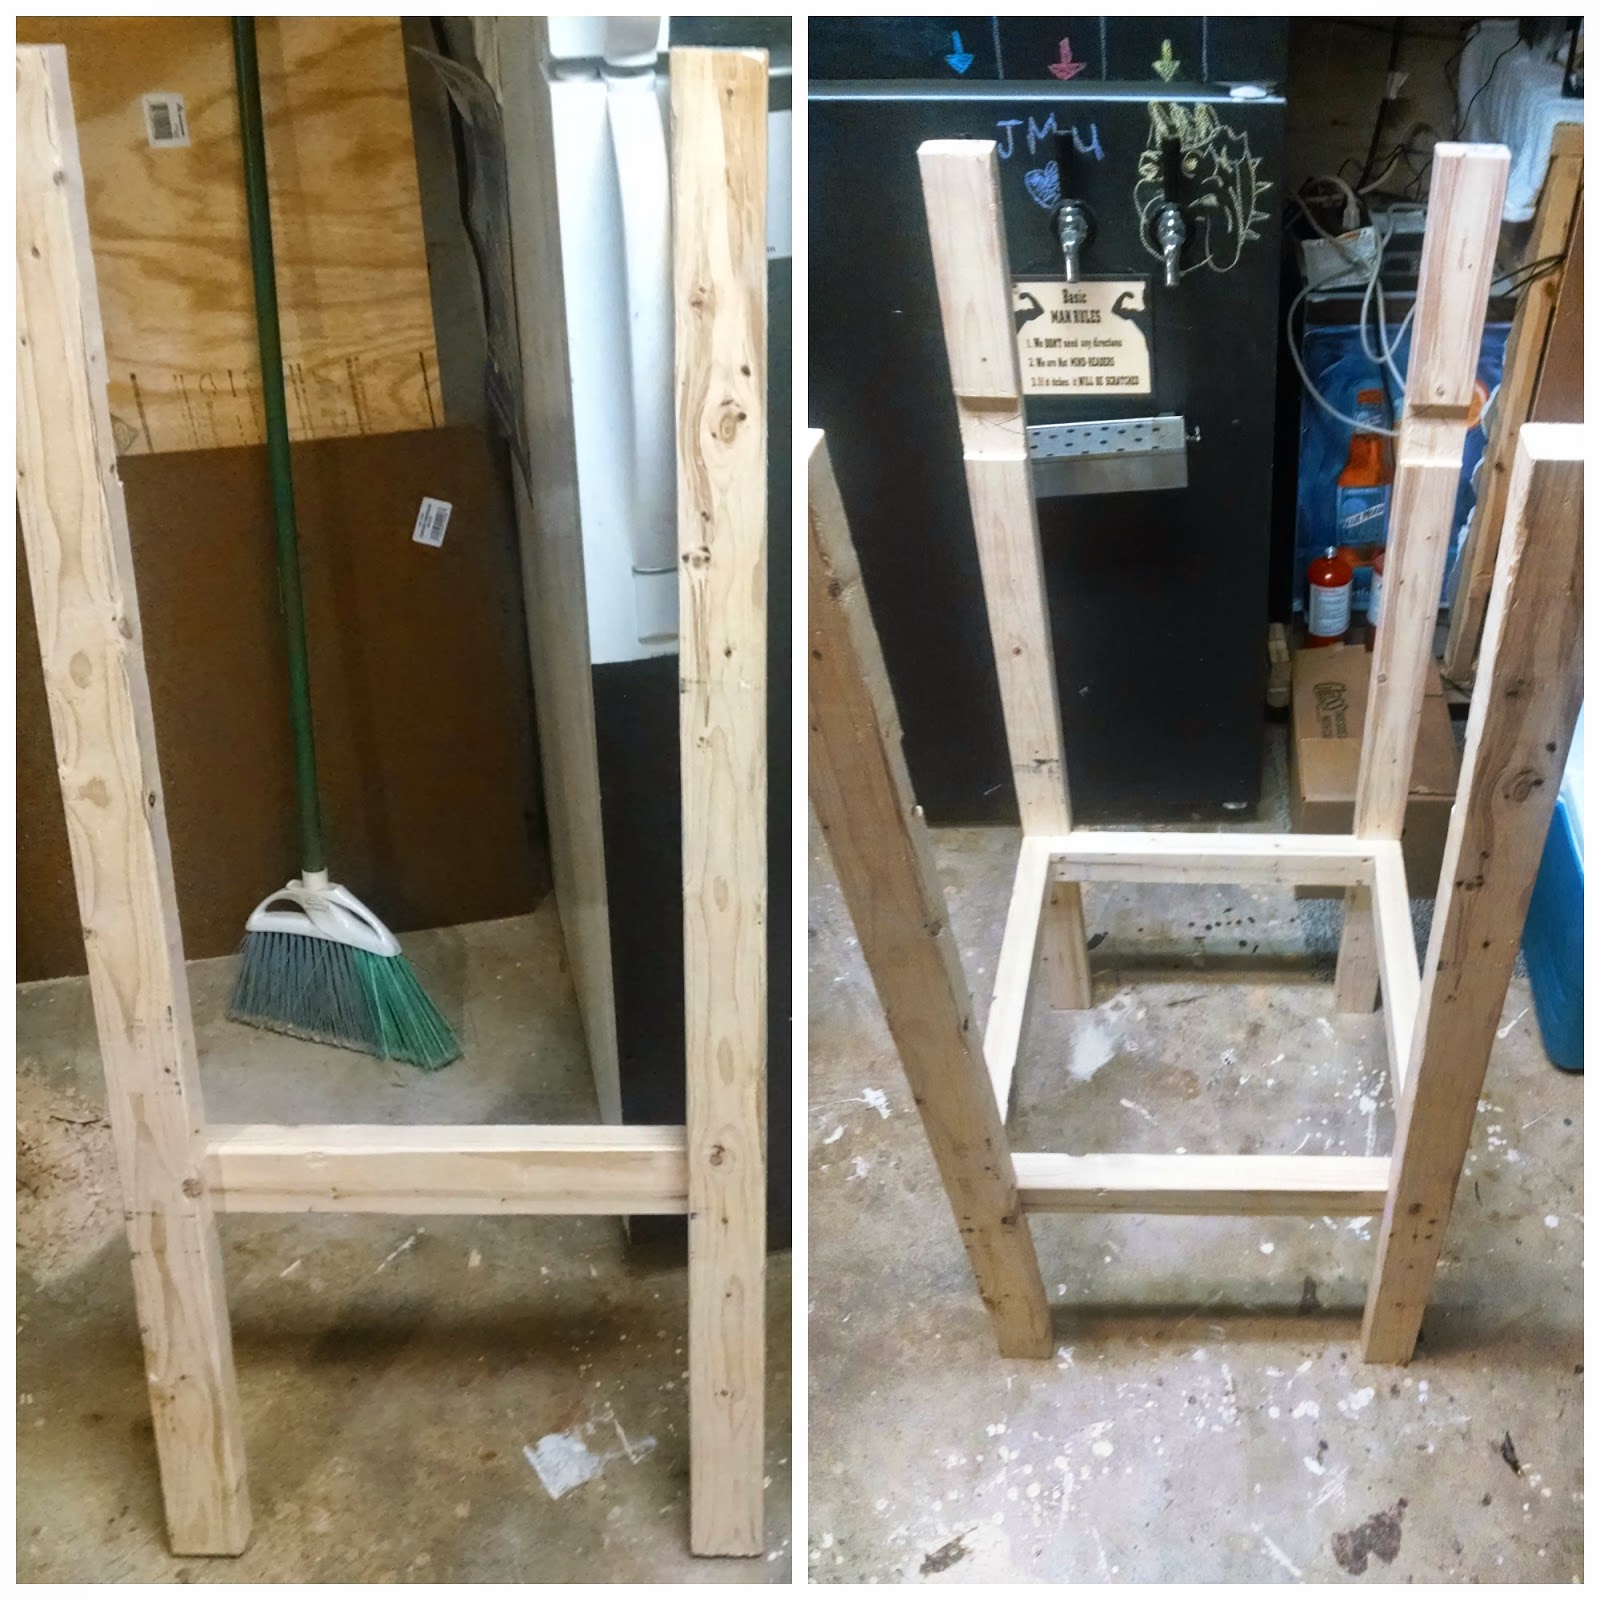
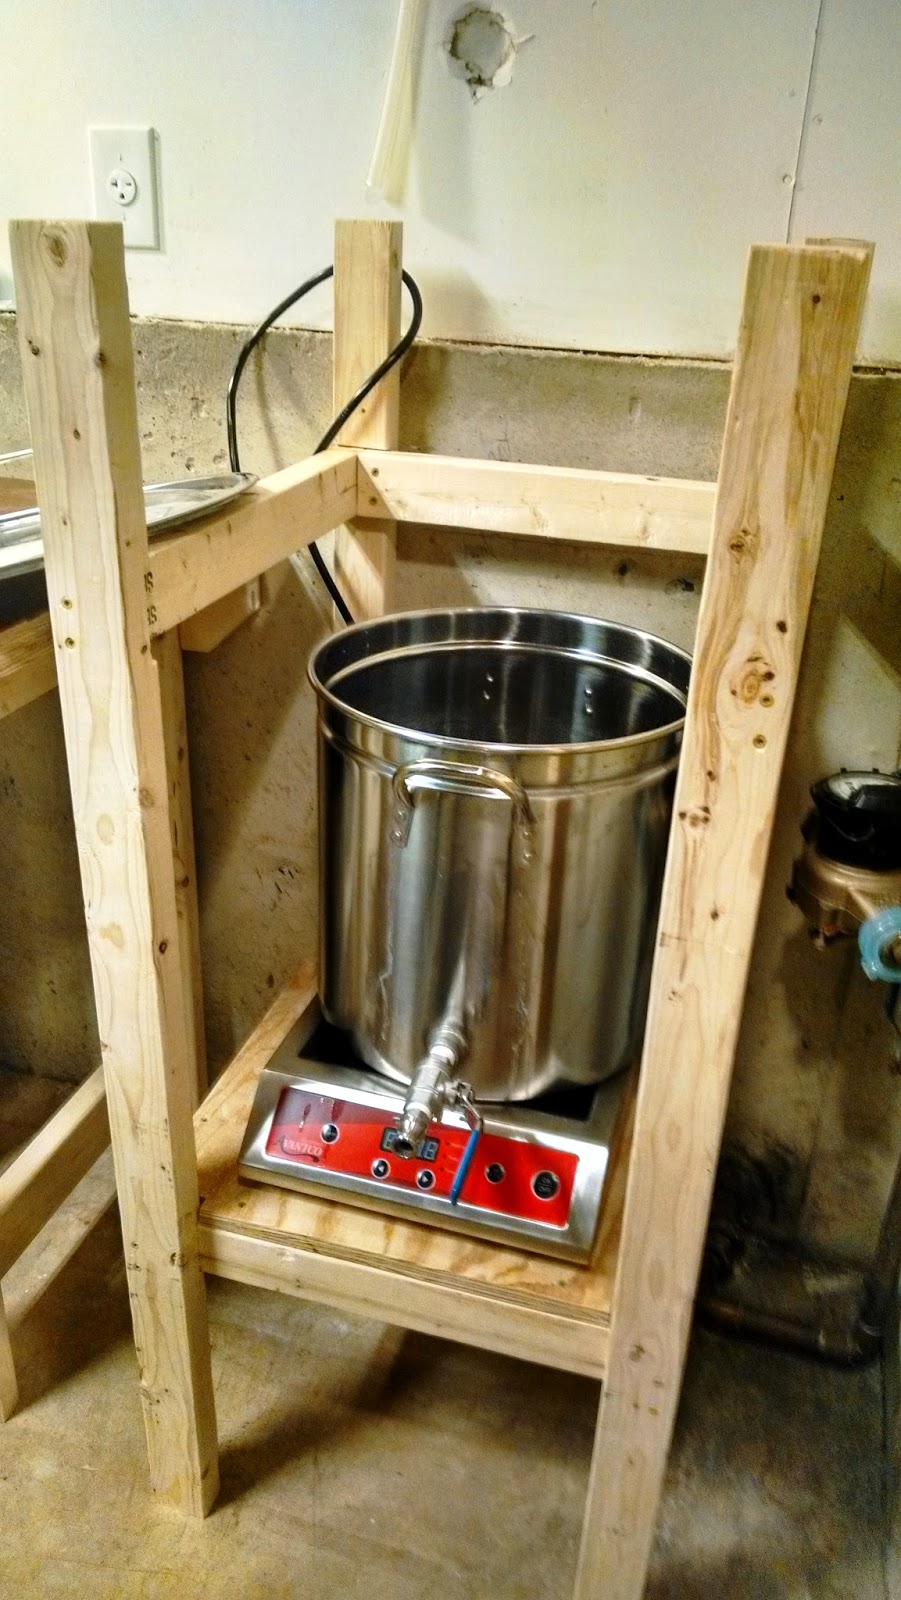
Brew stand frame
(Stand Frame)


After pre-drilling and screwing in the horizontal pieces for the burner-level of the stand.  I cut a plywood shelf, with notched corners, and fastened it down to the 2x3s with a few 1 5/8" drywall screws.

I then cut the 3 pieces for the open-ended top square and fastened them with the deck screws.  I did my best to try to keep everything in square, but the 2x3s had warped a bit since purchase.  This probably didnt' matter as I later found out the area of the basement I planned to put the brew stand is not even close to being level.  Oh well!  I placed a tiny shim under that front right leg and all is well.

Hypothetical Brew Day Pictures

Here are some pics with things in place and testing out different hypothetical brew day procedures.
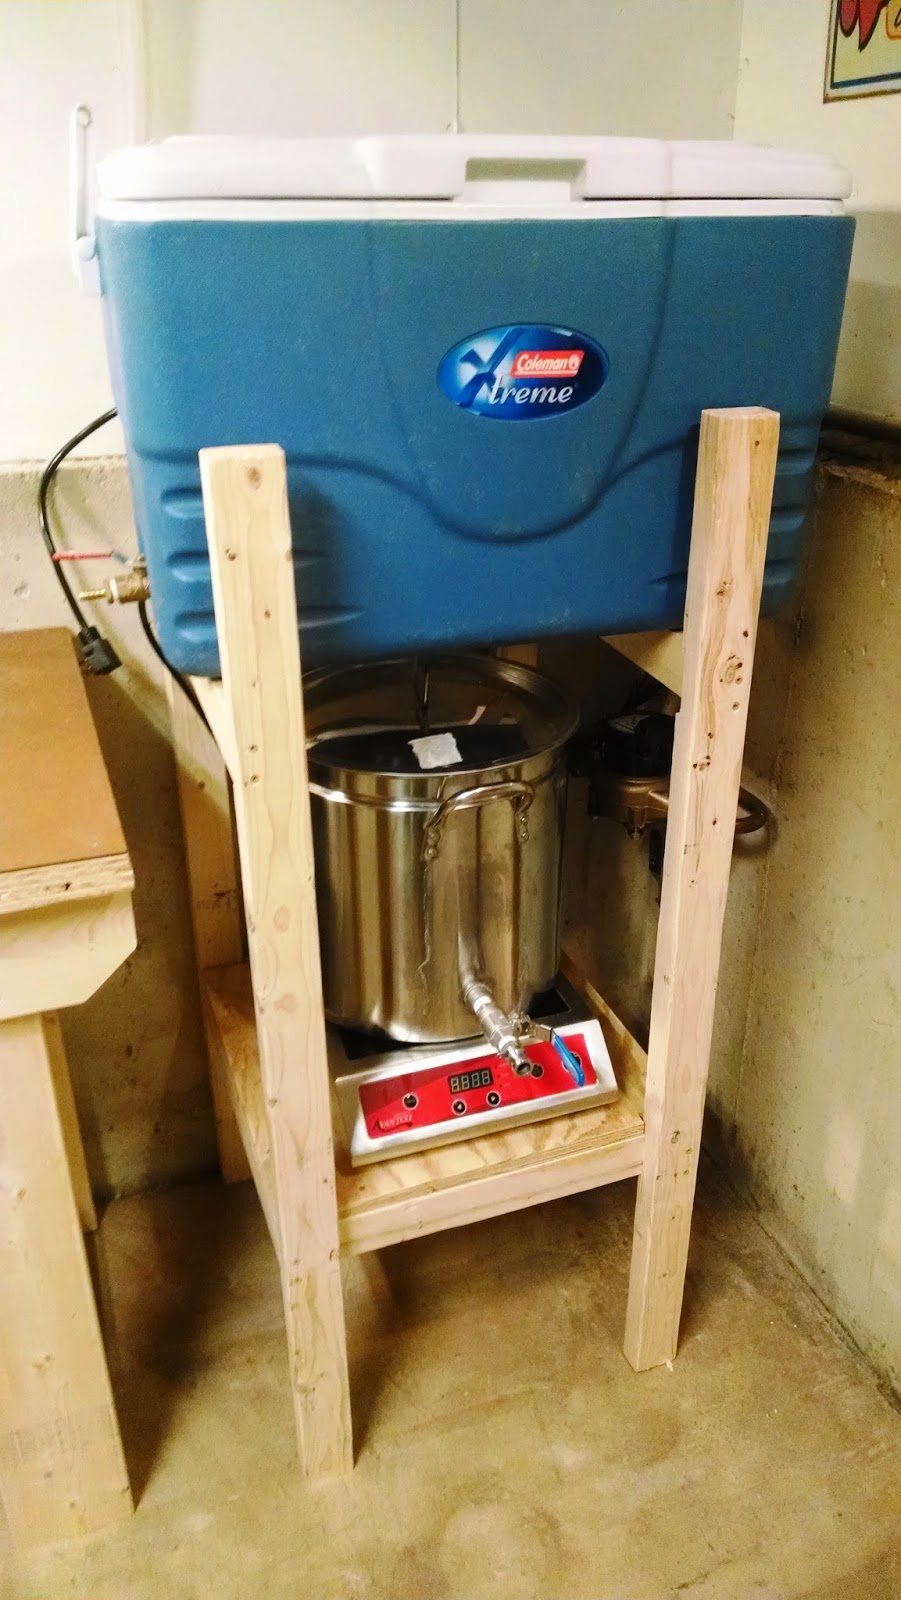
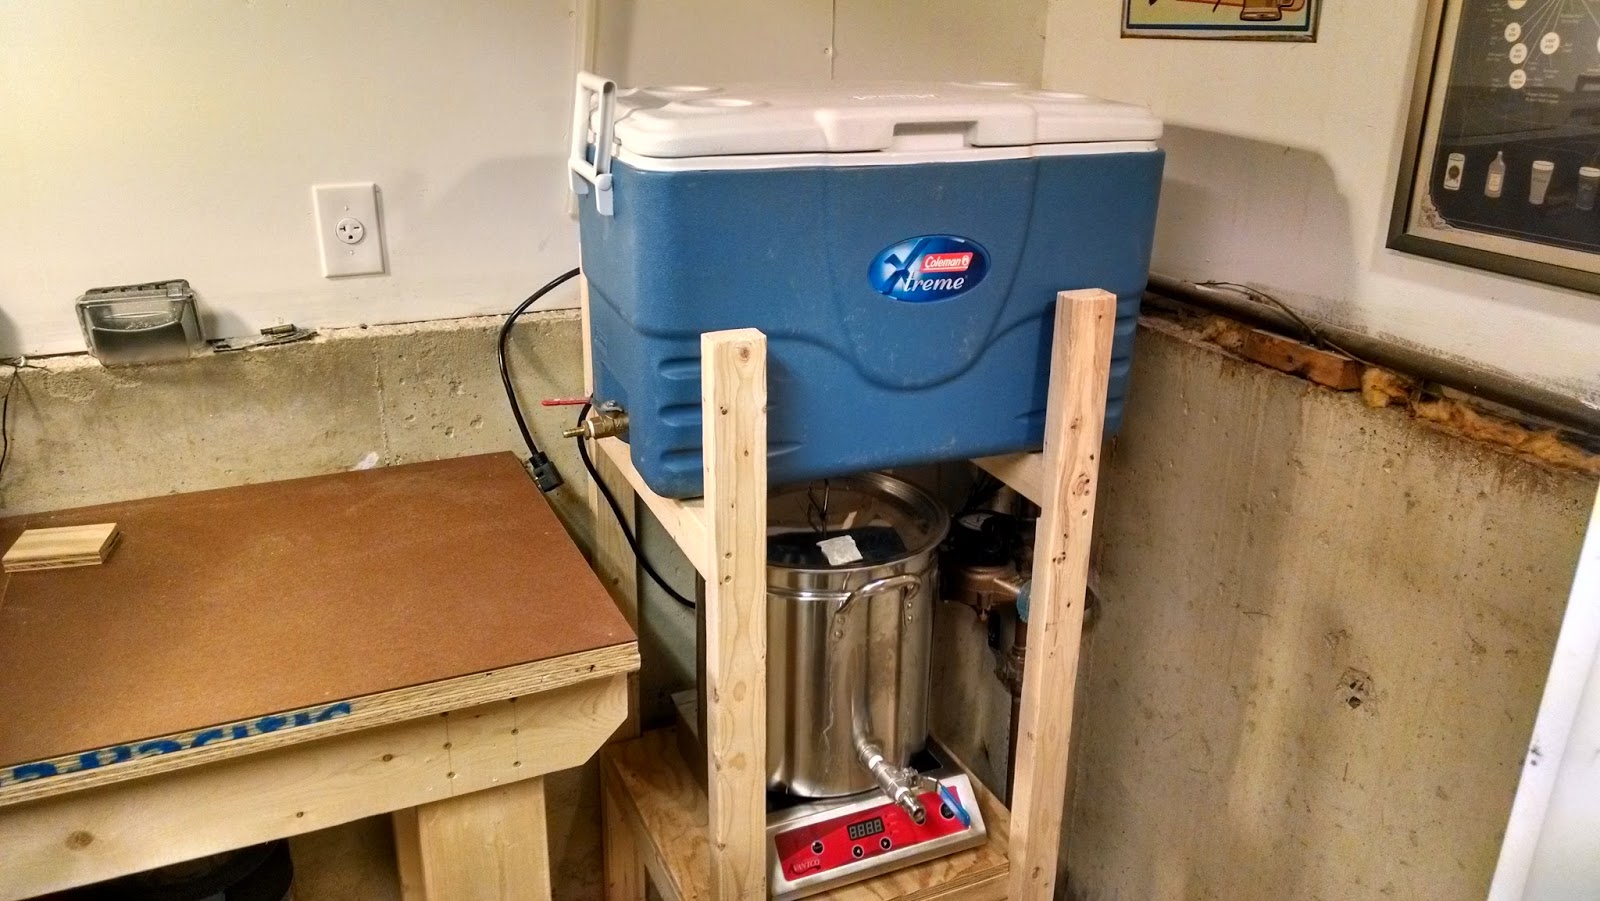
Hypothetical mash mode
(Brew stand - hypothetical mash mode)

Hypothetical sparge mode
(Brew stand - hypothetical sparge)
Hypothetical boil mode
(Hypothetical boil)
Kettler to fermenter
(Hypothetical draining wort to fermenter)

(Brew stand next to the bench - storage mode)

Future tweaks


I think I may cut the top of the front two vertical pieces shorter in the future.  I would have done it, but I had already swept up the basement of all the sawdust and didn't feel like repeating process.  They are at the height they currently are just cause I had had the guy at home depot cut them in half for transportation purposes.  I can image it will be easier to move the mash tun with grains for cleaning if I shorten those pieces.

I am probably going to stain or apply some sort of finish to the wood mainly to protect it from moisture and spills.  Being made out of wood, I will be able to easily adapt the stand in the future if I ever go with a pump or RIMS setup, but I think this will work fine for now.

Stay tuned as I hope to tackle plumbing a new utility sink and water lines next.

Monday, January 5, 2015

Indoor Brewery Plans and Existing Brew Setup in House

I feel like I am always mentioning the indoor brew setup, but never acting on it.  Well I got a little bit of time off (Not a fan of calendar year based leave and use/it lose it) at the end of 2014 and decided to really brainstorm what I want and how it will work in my tiny space - Over-analyzing and researching...typical!.  I printed out some graph paper and got to work measuring and drawing things out.  I have always been a fan of using dimensional 2x3 for projects whenever possible (used it for the shelving shown in the pics below below).  For most applications 2x4s are overkill and since space is somewhat tight I plan to use 2x3's for my brewstand to save a few inches.  Below is the scanned drawing.  I tried to get things pretty accurate, and while I acknowledging I am a horrible artist, I think  it came out pretty well.  My Microsoft paint skills on the other hand...not so hot.

Scanned brewery plans
(Brewstand Sketch - for reference countertops are generally 36" high)

There were a few things I really wanted to accomplish with this brewstand:
  1. Small Footprint - I want it to be no larger than a 2' square.  This should be 20"x23"
  2. Gravity Fed - With the kettle ball valve approximately 21" I can just drain into my better bottles (which are 20" tall).  Mash tun gravity fed to kettle just like I do in my typical setup.
  3. Self Contained - I loathe setting up and tearing down outside.  The planned system will allow me to keep things in place when not in use.  The top shelf holding the mash tun will come off when I start the boil
  4. Wood - I definitely understand why a lot of people choose metal for their brewstand, but I prefer wood for aesthetics, cost, and because I have the tools to work with it.
I do plan on adding casters to the stand by incorporating them into a hinged system which will be lockable - wheels disengaged when unlocked.  I will definitely write up a post on the wheel system once I figure it out myself and can explain it more thoroughly.  I have about an eight foot by four foot rectangular area of my basement to incorporate this stand (turquoise to the right) as well as a multipurpose six foot workbench (red to the left).  I need both the bench, and the brew stand to be sturdy (locked in place) but mobile.  The left edge of the workbench puts me next to some tool storage (far right in the second picture below).  I will need to move the bench to get to those tools occasionally, so it will also be on wheels.  I figure I can roll the brewstand toward the the fridge and slide the bench to the right to access the storage on the left.  I am still unsure of whether I will vent outside on the right (dogfishead sign) or straight (flying dog sign)

Workbench and brewstand
(Proposed workbench and brewstand area)
Basement Storage
(Storage area: Tools on left, grain on the right)


I don't have an outdoor storage shed yet, so I have a lot of tools scattered around the tiny unfinished area of my basement.  This area acts a whole-house storage and brewery.  I am in desperate need of a workbench for standard household projects and it will also get a lot of use during brewday once it is all setup.  The bench will most likely take on the functions of a weighing table, racking table, and yeast starter table.  The last picture is of my my kegerator and fermentation chamber.  Oh, you noticed how ugly my fermentation chamber is did you?  You're not alone, Mrs. Shegogue often comments on the lack of visual appeal and constantly asks "I thought you said you were going to get a new one which is smaller and more appealing."  Eh, it works so why fix it?  I just recently added the shelf to house my glassware and find it really handy as I don't have to run upstairs for a glass when I want to sample some fine brew.

Keg and Ferm Chamber
(Kegerator and Fermentation chamber)
So there you have it, the current state of the Shegogue Brew, brew house.  I am still a ways out, but at least we are making some sort of progress rather than just talking about it!