Friday, January 30, 2015

How fast is fast? Optimizing Your Existing Immersion Wort Chiller

I built my wort chiller four years ago.  I purchased a 50' roll of soft 1/2" copper tubing and four 90 degree elbows for about $69.80 + $13.63 shipping.  I then had to purchase soldering equipment (lead free solder and flux) and brass garden hose fittings.  So I was probably in about $100 or so for my wort chiller build.  When I got around to constructing it I only used about 40' of the tubing due to a height restriction on the vessel I was using to form the circular structure.  I still need to figure out what to do with the rest of that copper tubing!


Fast forward to 2015, and I am kind of surprised to see that the prices of copper today are actually less than they were in 2010.  In fact, the site I purchased my materials from even carries packages specifically for immersion chillers!

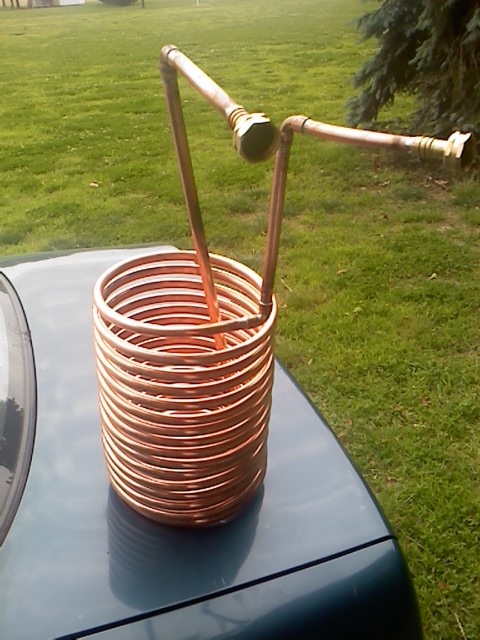
For a while I thought my immersion chiller was just not as good as some of the commercial products out there.  I would see products advertising 5 minutes to get to pitching temps… 5 minutes!  I was immediately filled with envy as I recalled that last brutal brewday of the summer.  You know, those 90 degree days where incessant stirring for 20+ minutes only gets you down to 78 F.  I thought it was just my crummy chiller, but as with all things in my life I began to thoroughly research the issue at hand.

I Googled for any information and product reviews I could find on wort chillers.  I saw a lot of people with a similar dilemma give up on their immersion chiller and go with a counter-flow or plate chiller.  I was also aware of Jamil Zainasheff's recirculating whirlpool system.  All of these seemed like wonderful options.  Unfortunately, they too, all seemed to have flaws.  The biggest of these flaws to me was that a pump was required (I don’t own a pump).  I kept researching and was really intrigued by the JaDeD Brewing chillers.  Their chillers post some crazy fast chill times with the Hydra boasting a 3 min chill to 68*.  Okay, this is some sort of brewing magic, right? Do you need to sprinkle special chilling dust at flameout to achieve these results? The answer: Nope!  JaDeD provides insight to this sorcery by explaining the science behind fast cooling.  To paraphrase, it is essentially the input chilling water flow rate and wort movement which dictates how fast you can chill.  Yes, the temperature of your source water can make a big difference, but that wasn't the component I was lacking.

I have always had good wort movement - I stir the heck out of it as I am chilling.  However, I, for some silly reason thought if I turned my spigot on only halfway or even a trickle, that I would somehow be extracting the most heat possible from the liquid?  Not sure how I came up with that inaccurate idea.  Maybe, I figured running the water through too fast wouldn’t fully utilize that volume of water's potential? Or maybe I was just drunk.  Either way, I now feel like such a bonehead.  Keeping cool water flowing through your immersion chiller
REAL fast and keeping the wort moving (to avoid hot and cold spaces) is what results in fast chilling.

The next brewday when it came time to chill, I opened up that spigot full bore and “let 'er rip.”  Boy was I surprised to  be within 10* of my groundwater temperature within 5.5 minutes.  Now I don’t feel so insecure about my immersion chiller, and I can get back to brewing some great beer.  I invite you to learn from my mistakes and make the most of your wort chiller - if it aint broke don’t fix it!

How do YOU chill your wort and why?  Let me know in the comments below!


After writing I remembered reading a post on Brulosophy a while back where Marshall tested using a pump to recirculate vs his (and my method) of moving the chiller all around.  Spoiler alert, manual beats mechanical.

Friday, January 23, 2015

Brew Thru #1 - Other Blogs, Small Batch Bottling Tips, and Equipment upgrades

So in the past I had written some blog posts that I just simply titled "Brewery Update [insert date]" and while that was appropriate, because it was an update, I want to try and better categorize any and all update-type posts in the future.  I also want to try and label posts with appropriate tags to be able to search my growing list of posts better.  I am deeming these smorgasbord posts as Brew Thru's.  I liken this much to the growing youtube tag Homebrew Wednesday (HBW).  If you aren't aware, HBW is the acronym people use when they make short videos every Wednesday and post the video on youtube.  These videos usually feature a guy tasting a beer and giving any updates related to their homebrew gear or gadgetry.  They can be very entertaining, however, only 5% - 10% of the video provides informative information.  I hope to outline these updates in a way which allows readers to quickly skim and extract any informative content they may find useful.

Without further ado, lets brew thru!

Other Blogs


I have a lengthy commute, sure I have mentioned that before, and I utilize my time on the commuter train to to read other homebrewing blogs.  I cam across a few recently which I am really enjoying and want to highlight them.  As usual, you can view all my blogs over in the right sidebar:

  • Sui Generis Brewing - Homebrew blog with a focus on yeast.  The author has developed a great series of youtube videos for the beginner in yeast culturing and working in an aseptic environment.  If you are interested in start a small homebrew yeast lab, definitely check out this site.
  • Eric Brews - This is somewhat of a new blog created back in November to document the brewing of a ton of beer for the authors coming nuptials which are this weekend, I think?  I stumpled upon Eric's blog doing my semi-weekly google searching for "induction" or basement brewing setups.  Eric is using the avantco burner, too.  I am hoping his blog stays frequently updated once his marital status changes.
  • Shegogue Brew on HomebrewTalk - I have written a few articles and plan to write some more for the popular online homebrew community.  I have also provide a link to the right specifically for my posts.  I will try to plug them through future brew thrus.


Cool New Ideas - Small Batch Bottling Tips


Has your significant other every told you that you brew to often?  If not, you may not be brewing enough!  If so, I may have found some rationale for you to justify how infrequently you do brew, in comparison... thanks to Matthew Murray.  Matthew is a homebrewer from NC who has probably been brewing more often than a lot of commercial breweries.  He started a website to document his journey of brewing a beer everyday for an ENTIRE YEAR.  Matthew is a little over a year into this and posted a new idea which I haven't seen before.  If you are a small batch (1-2 gallon) brewer, his tips on bottling are must see will definitely speed up your process.  

Equipment Upgrades


I have been using a new 9 gallon Bayou classic (1036) pot for my last 5 or so brews.  I made this kettle change in my anticipation of going electric.  The 15 gallon aluminum pot I used to use was not induction capable.  The new pot came with a ball valve, and although the pain of cleaning and sanitizing my autosiphon is now relegated only to packaging day, I learned the hard way how messy it can be to try and get wort from the kettle to the fermenter with just a ball valve.  I decided to solve this issue and future-proof my kettle by ordering a set of camlcok quick disconnects and silicone tubing from brewhardware.com.  I used the setup to drain from my kettle to a Better Bottle on Monday when I brewed and it worked like a charm!  Yet another small step in my constant goal of brewday time optimization.


Friday, January 9, 2015

Nothing goes better with Homebrew than Pizza

We all know that beer goes really well with Pizza.  Maybe it was those formative days in college where my Friday night ritual was to go to Little Ceasar's and grab a $5 hot-and-ready pizza.  I'd then bring it back home where I would wash it down with some Natural Light (I know, before I knew about good beer).  Well fast-forward a few years and I now really enjoy making my own pies.  Anyone who knows my wife knows she has a garlic allergy.  Yes, you can be allergic to garlic!  This is very unfortunate, as garlic is found in almost all prepackaged sauces and items.  This is what started me in the quest to make tasty pizza, which was garlic free.  So today is Friday and I am presenting you with my process for making pizza!

I can't take full credit for the interest in making pizza because that goes to my friend Josh.  He got into it before I did, and he is much better and more precise.  I also learned a little from the internet and got my recipe using this calculator, which I highly recommend.

Shegogue Brews Recipe - Makes two, 11"-12" pizzas
Pizza Dough Ingredients
2 1/2 cups - 2 3/4 cups Flour (See I told you Josh was more precise, he weighs out all the ingredients)
8 oz warm water
3/4 tsp salt
1 1/2 tsp sugar
1/4 tsp IDY (Instant Dry Yeast)
*Oil -  I use around 2 to 3 "cap-fulls" of oil.  I realize this is pretty vague but see instructions below.  The more oil used, the more "chewy" the crust will be.

Hand Kneading Pizza Dough Instructions
In a measuring cup, collect your warm water and add IDY to rehydrate.  In a mixing bowl, combine your salt, sugar and flour.  Use a table knife or spoon to create a depression in the center of the dry ingredients.  Add water and yeast into the dry ingredient depression.  Mix liquid into the dry ingredients in a circular motion slowly pulling in more and dry ingredients into the wet mixture.  Once mixed (may have some flour which didn't mix in, which is ok) pull the dough out of the bowl and onto your countertop.  Pour some oil onto the counter top and start to knead dough over and into the oil.  Oil will help the dough if it is sticky (you used too much water or not enough flour) or dry (too much flour or not enough water).  Continue to knead until dough is a smooth texture and springs back when you stick your finger into it.  Cut dough in half and form into balls (the more round you can make the balls, the easier it will be to form a perfect circle later on).  Place balls into two lightly greased bowls and cover.  Allow to sit for a few hours**

**At this point you can refrigerate for 24-48 hours, or freeze the balls.  You just need to allow 2-4 hours of the dough at room temperature so it can rise prior to forming your pizzas.

Pizza Ingredients
(Ingredients to make dough)

Water Temp to Rehydrate Yeast
(Water Temp to Rehydrate Yeast)

dry ingredients
(Dry ingredients)

Adding water
(Adding water and yeast to dry ingredient depression)

Dough more kneading
(Dough is not smooth enough yet, needs more kneading)

Dough ready
(Dough ready)

Split dough
(Split dough in half)

Dough balls in greased bowl
(Dough balls formed and greased in bowl)

Dough after rising
(Dough After rising)

(Video of me forming dough from over a year ago.  This video was not filmed with the rest of these pictures, but you get the idea)

I am going to leave the rest of the ingredients up to you.  We use hunts tomato sauce (does not contain garlic) and add a little oregano and sugar to taste.  Josh takes cento brand whole peeled tomatoes and throws them into the food processor for a more natural tomato sauce.  After forming your dough and placing it on a well floured pizza peel, spray it with cooking oil spray (PAM).  This is important so the sauce doesn't soak into the dough and the crust forms a nice golden brown color (I forgot to thoroughly coat the dough on the pizza with olives, pepperoni and jalapenos with oil and the crust didn't brown up - see below).  Spread the sauce from the middle to the outer edges in a circular motion with a spoon.  Add cheese and toppings.  If the pie won't easily slide on the peel, lift up the edges and blow underneath.  I do this all the way around until I can shake it back-and-forth easily.  I then open the oven and slide it onto the hot pizza stone.

You want your stone to be AS HOT AS POSSIBLE.  My oven goes up to 550°.  I allow it to heat up to that temp and then hold there for 15 minutes or so before placing my first pie on it.  Baking should only take a few minutes.

Pizza Pie before oven
(Pepperoni Pizza before being placed on hot stone in oven)

First Pizza
(Pepperoni, Olive and Jalapeno Pizza - forgot to oil the crust!)
Pizza on cooling rack
(Pizza cooling on a cookie rack to prevent moisture and steam from soaking back into the crust and making it soggy)

Pizza Crust
(Pizza Crust)
Cut, Serve, and Enjoy.  Don't forget that homebrew to wash it all down with!


Do you ever make your own pizza?  Let me know your tips and tricks in the comments below!


***After some thought and discussion with Josh, I will be making another post at a later date to discuss many more ingredient variables, intricacies, and discussion points.  

Monday, January 5, 2015

Indoor Brewery Plans and Existing Brew Setup in House

I feel like I am always mentioning the indoor brew setup, but never acting on it.  Well I got a little bit of time off (Not a fan of calendar year based leave and use/it lose it) at the end of 2014 and decided to really brainstorm what I want and how it will work in my tiny space - Over-analyzing and researching...typical!.  I printed out some graph paper and got to work measuring and drawing things out.  I have always been a fan of using dimensional 2x3 for projects whenever possible (used it for the shelving shown in the pics below below).  For most applications 2x4s are overkill and since space is somewhat tight I plan to use 2x3's for my brewstand to save a few inches.  Below is the scanned drawing.  I tried to get things pretty accurate, and while I acknowledging I am a horrible artist, I think  it came out pretty well.  My Microsoft paint skills on the other hand...not so hot.

Scanned brewery plans
(Brewstand Sketch - for reference countertops are generally 36" high)

There were a few things I really wanted to accomplish with this brewstand:
  1. Small Footprint - I want it to be no larger than a 2' square.  This should be 20"x23"
  2. Gravity Fed - With the kettle ball valve approximately 21" I can just drain into my better bottles (which are 20" tall).  Mash tun gravity fed to kettle just like I do in my typical setup.
  3. Self Contained - I loathe setting up and tearing down outside.  The planned system will allow me to keep things in place when not in use.  The top shelf holding the mash tun will come off when I start the boil
  4. Wood - I definitely understand why a lot of people choose metal for their brewstand, but I prefer wood for aesthetics, cost, and because I have the tools to work with it.
I do plan on adding casters to the stand by incorporating them into a hinged system which will be lockable - wheels disengaged when unlocked.  I will definitely write up a post on the wheel system once I figure it out myself and can explain it more thoroughly.  I have about an eight foot by four foot rectangular area of my basement to incorporate this stand (turquoise to the right) as well as a multipurpose six foot workbench (red to the left).  I need both the bench, and the brew stand to be sturdy (locked in place) but mobile.  The left edge of the workbench puts me next to some tool storage (far right in the second picture below).  I will need to move the bench to get to those tools occasionally, so it will also be on wheels.  I figure I can roll the brewstand toward the the fridge and slide the bench to the right to access the storage on the left.  I am still unsure of whether I will vent outside on the right (dogfishead sign) or straight (flying dog sign)

Workbench and brewstand
(Proposed workbench and brewstand area)
Basement Storage
(Storage area: Tools on left, grain on the right)


I don't have an outdoor storage shed yet, so I have a lot of tools scattered around the tiny unfinished area of my basement.  This area acts a whole-house storage and brewery.  I am in desperate need of a workbench for standard household projects and it will also get a lot of use during brewday once it is all setup.  The bench will most likely take on the functions of a weighing table, racking table, and yeast starter table.  The last picture is of my my kegerator and fermentation chamber.  Oh, you noticed how ugly my fermentation chamber is did you?  You're not alone, Mrs. Shegogue often comments on the lack of visual appeal and constantly asks "I thought you said you were going to get a new one which is smaller and more appealing."  Eh, it works so why fix it?  I just recently added the shelf to house my glassware and find it really handy as I don't have to run upstairs for a glass when I want to sample some fine brew.

Keg and Ferm Chamber
(Kegerator and Fermentation chamber)
So there you have it, the current state of the Shegogue Brew, brew house.  I am still a ways out, but at least we are making some sort of progress rather than just talking about it!

Thursday, January 1, 2015

To-Do List 2015 and Beyond

It is 2015.  I have officially been brewing for five years now and I have a few accomplishments to show for it.  I am not a big fan of "New Years Resolutions."  It is simply societies imposed way of making a should-do list, which never really amounts to anything because it is not a to-do list.  Like anything in life, if you truly want to do it, you will start doing it on your own with no real list necessary.

That being said, it can be advantageous to make a to-do list,and a long-term one at that.! I find that I often get off track feel I am not progressing if I do not have a to-do list to stay focused on my next objective.  The best part about a long-term list is that you don't have to feel the pressure of crossing something off by a certain point in time.  While deadlines can be beneficial, this is my hobby and other things in life are more important.  These other life moments can and will push the "pause button" on my hobbies to-do list.

Okay, now that I have gotten my ideology out the way, I am going to jot down a bunch of things I would like to-do.  I will try and reference back whenever I feel my progress is lacking in the homebrew department.

  • Brew more often - as we saw from my 2014 recap, brewing took a major backseat and I want to change that.  Here are some of my ideas for this:
    • 1 Gallon batches around once a month?
    • Keeping the pipeline full - no empty fermenters
    • Alleviate the impediments to brewing: see Indoor Brewing (below), time, space, setup
  • Indoor Brewing - I have been in the new house a year-and-a-half and only have an induction burner to show for the new brew space.  Below are some to tasks I need to accomplish to reach my goals
    • Utility sink and plumbing
    • Ventilation
    • Brewstand
    • Equipment upgrades
      • induction burner
      • brew fittings/hoses 
      • pump
  • Experimentation -I really want to start testing different brewing aspects so I can learn more about the hobby and keep things interesting.  Experiments are some of the best reads from other brew bloggers, like the Brulospher.
    • Split batch trials - 
      • different yeasts
      • different hops for dry hopping
      • different cooling techniques
      • different fermenting sizes
      • different pitch rates
    • Mash Times
    • Hopping schedules
    • Recipe Development
  • Blogging - I really want to write more for my personal blog... I think I will try and focus less on crafting perfect sentences (I tend to spend a lot of time rewriting lines of posts) and more time on just getting info out there for consumption.
Okay, I realize this has been a rather wordy post, but it is more for me to help define my direction in this hobby and hopefully enable me to produce more timely and interesting content.  Stay tuned and see how I do in 2015 and beyond!